

BETA TESTING GUIDE for the PROPBASE PROTOCOL MARKETPLACE CONTRACTS
Welcome, Beta Testers!
We’re thrilled to have you on board as we test our Secondary Marketplace. Your valuable feedback will help shape the platform. Below is a step-by-step guide to get started. Follow these instructions carefully to ensure a smooth testing experience.
First 50 BETA TESTERS will receive a $25 in PROPS reward distributed to their connected wallet 1 week after testing has completed.
Primary Marketplace
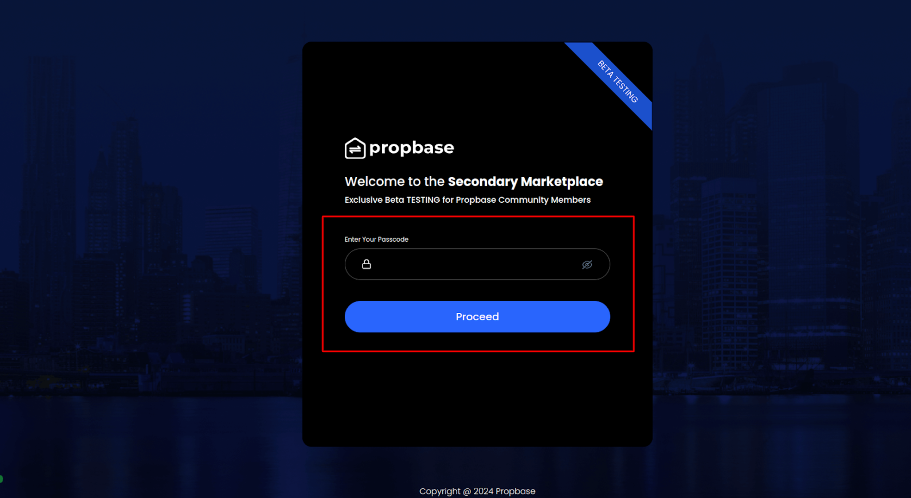
URL: https://beta.propbase.app
When you visit the URL, input the password: PropbaseLive@2024 to unlock the platform.
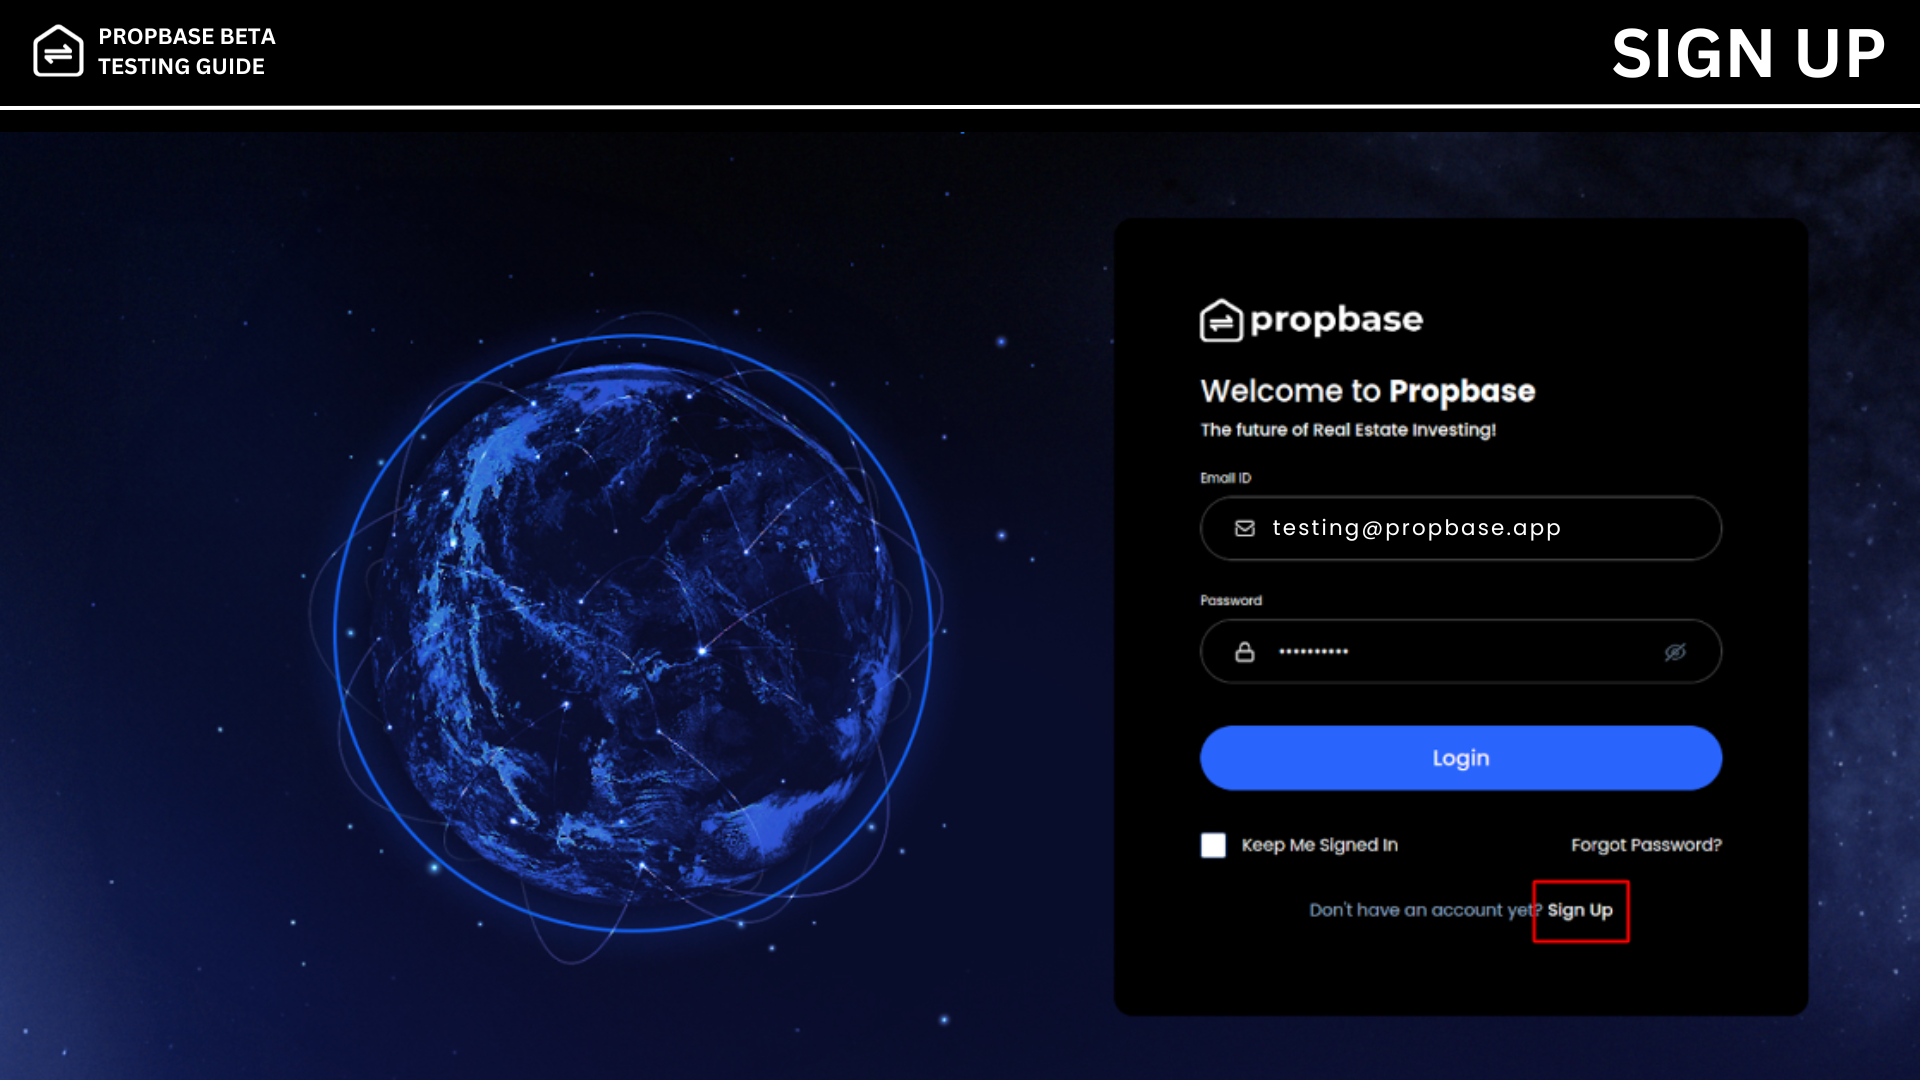
Step 2: Sign Up and Verify your Email
Create an account using your email address. Once registered, check your inbox for the verification email and confirm your account
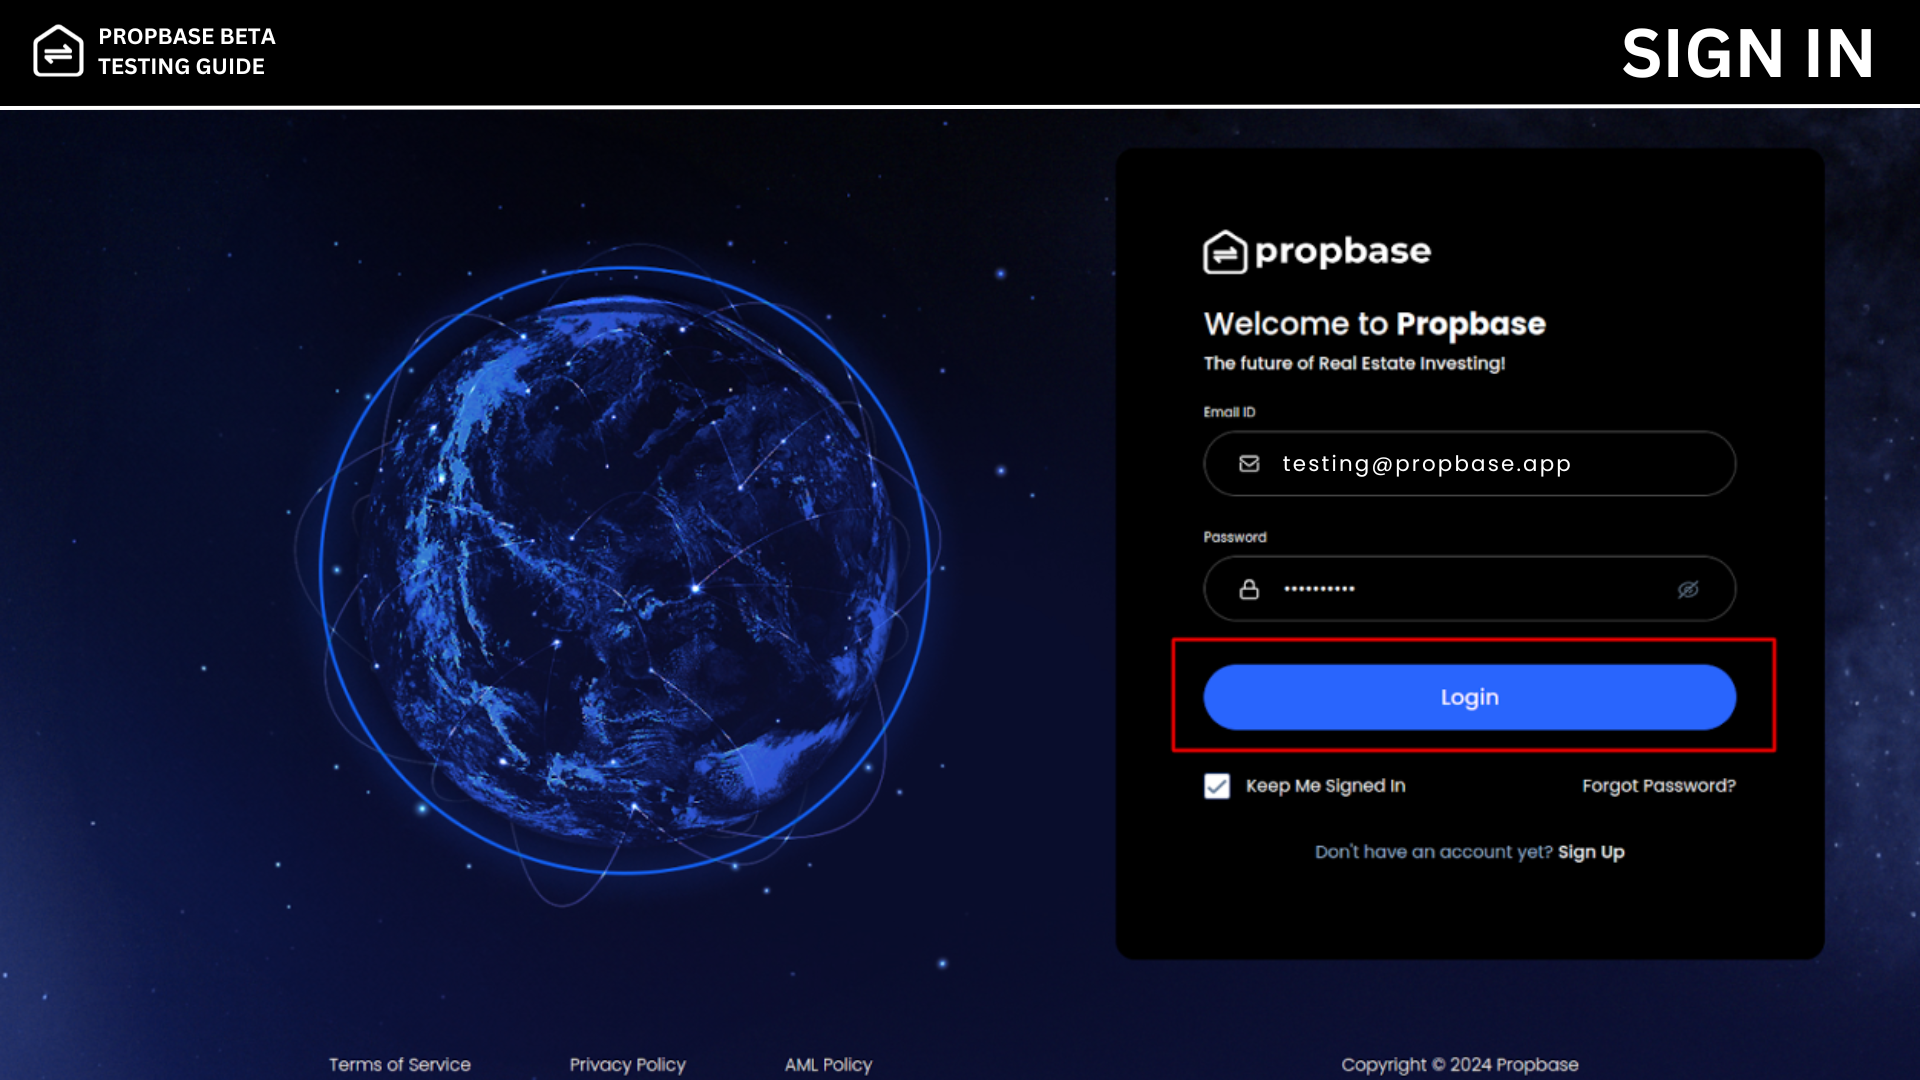
Step 3: Log in to YOUR New BETA TESTING Account
Use your registered credentials to log in as a user.
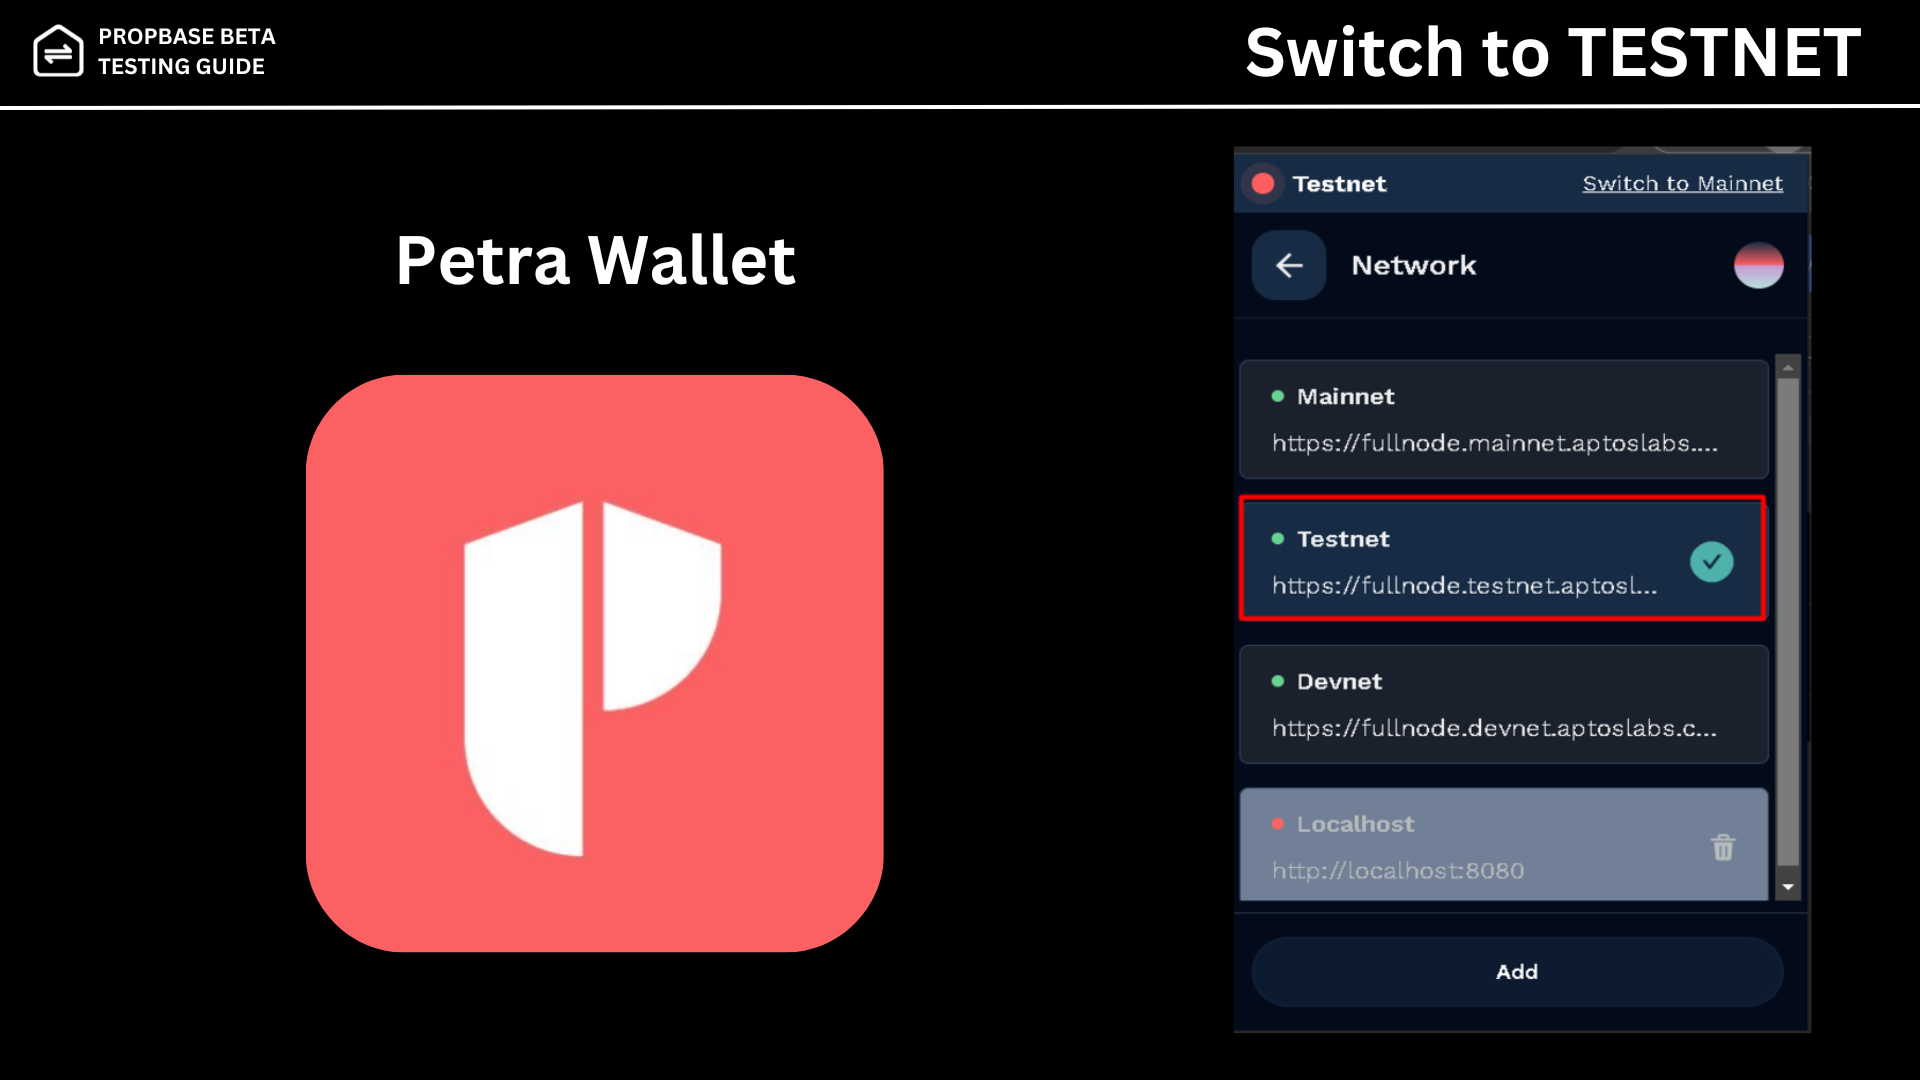
Step 4: Prepare your Petra Wallet
Ensure you have an Aptos wallet ready and fund it with APT.
Note: The app currently supports Testnet, and only one wallet address can be connected per account. Ensure you use the same wallet address throughout the testing process.
Important: Initially, all users will be connected to the Mainnet. However, for beta testing, please ensure to switch from Mainnet to Testnet before proceeding.
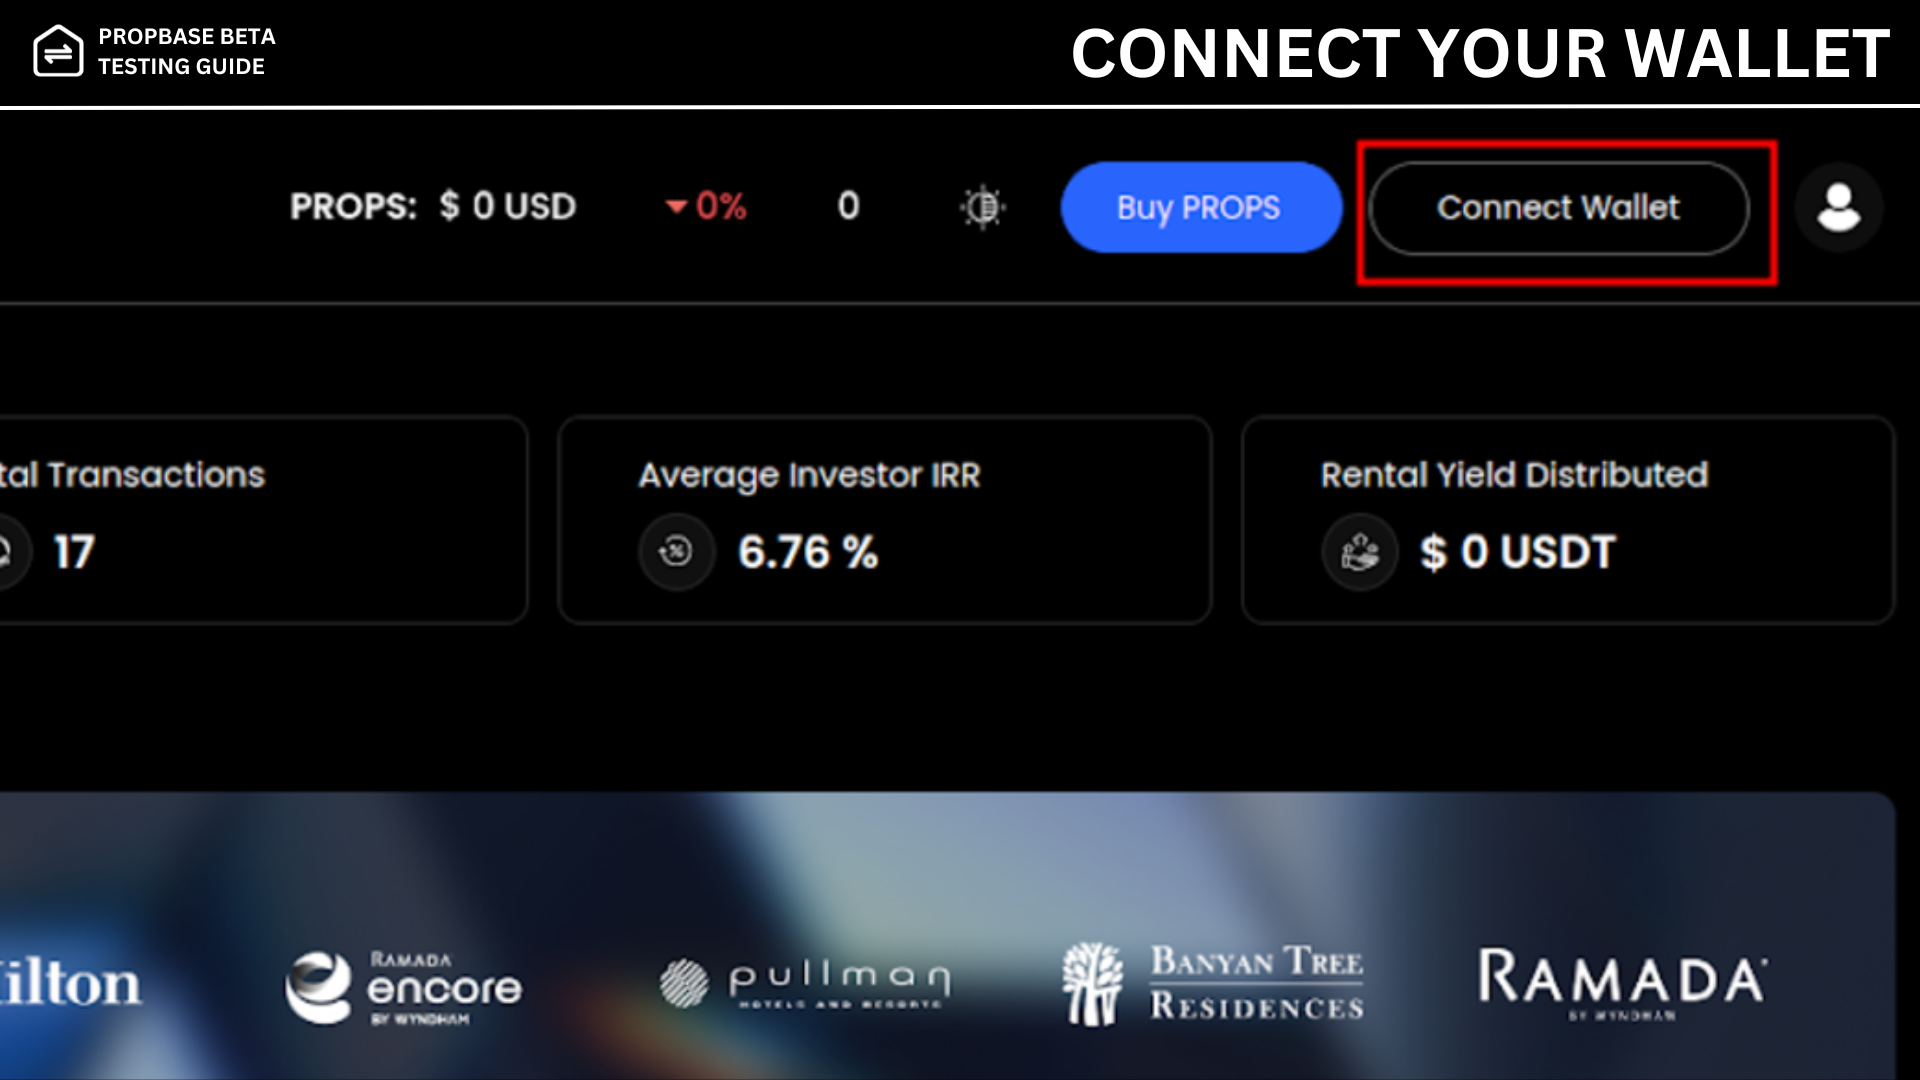
Step 5: Connect Your Wallet
Link your wallet to the app.
Important: Be cautious, once connected, your wallet becomes permanent, and you will not be able to modify or change it later!
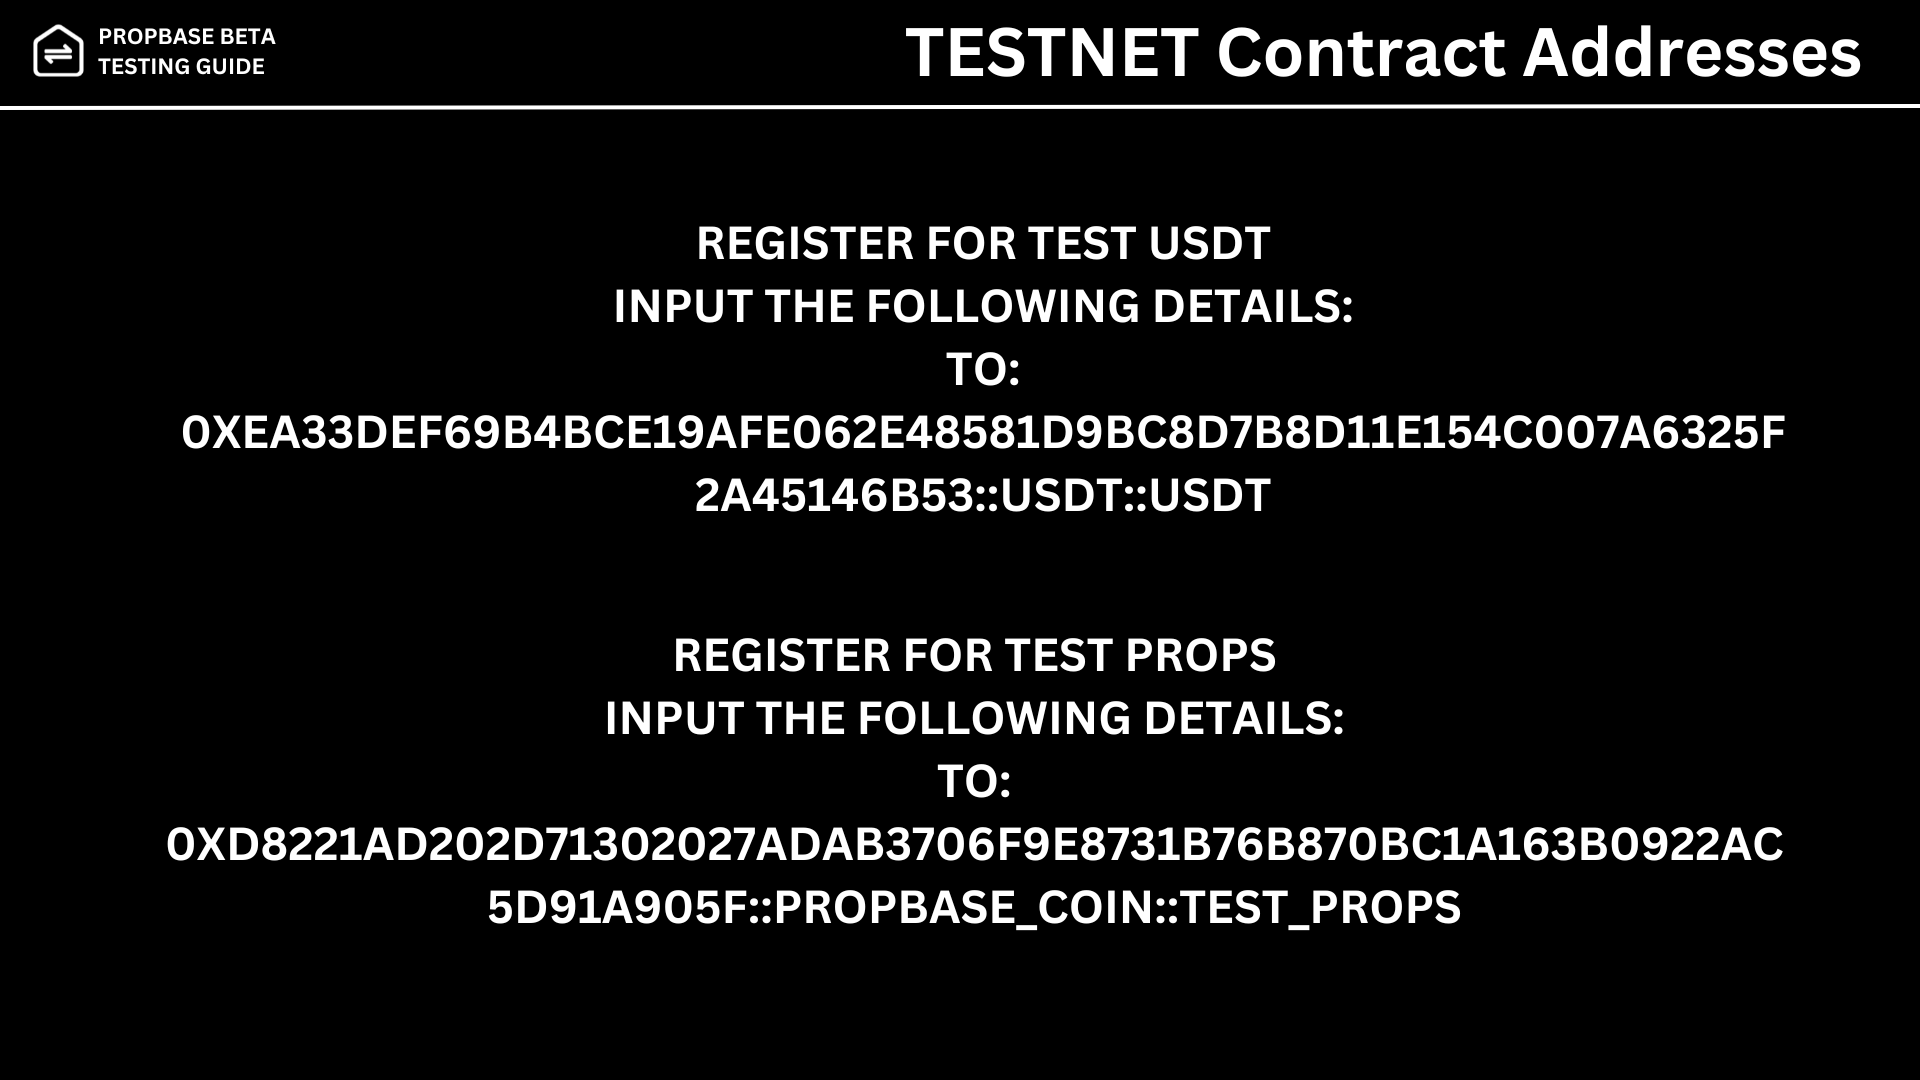
Step 6: Register for TEST TOKENS
You will need TEST_USDT & TEST_PROPS
Before proceeding, you must register to receive TEST USDT and TEST PROPS. Follow these steps:
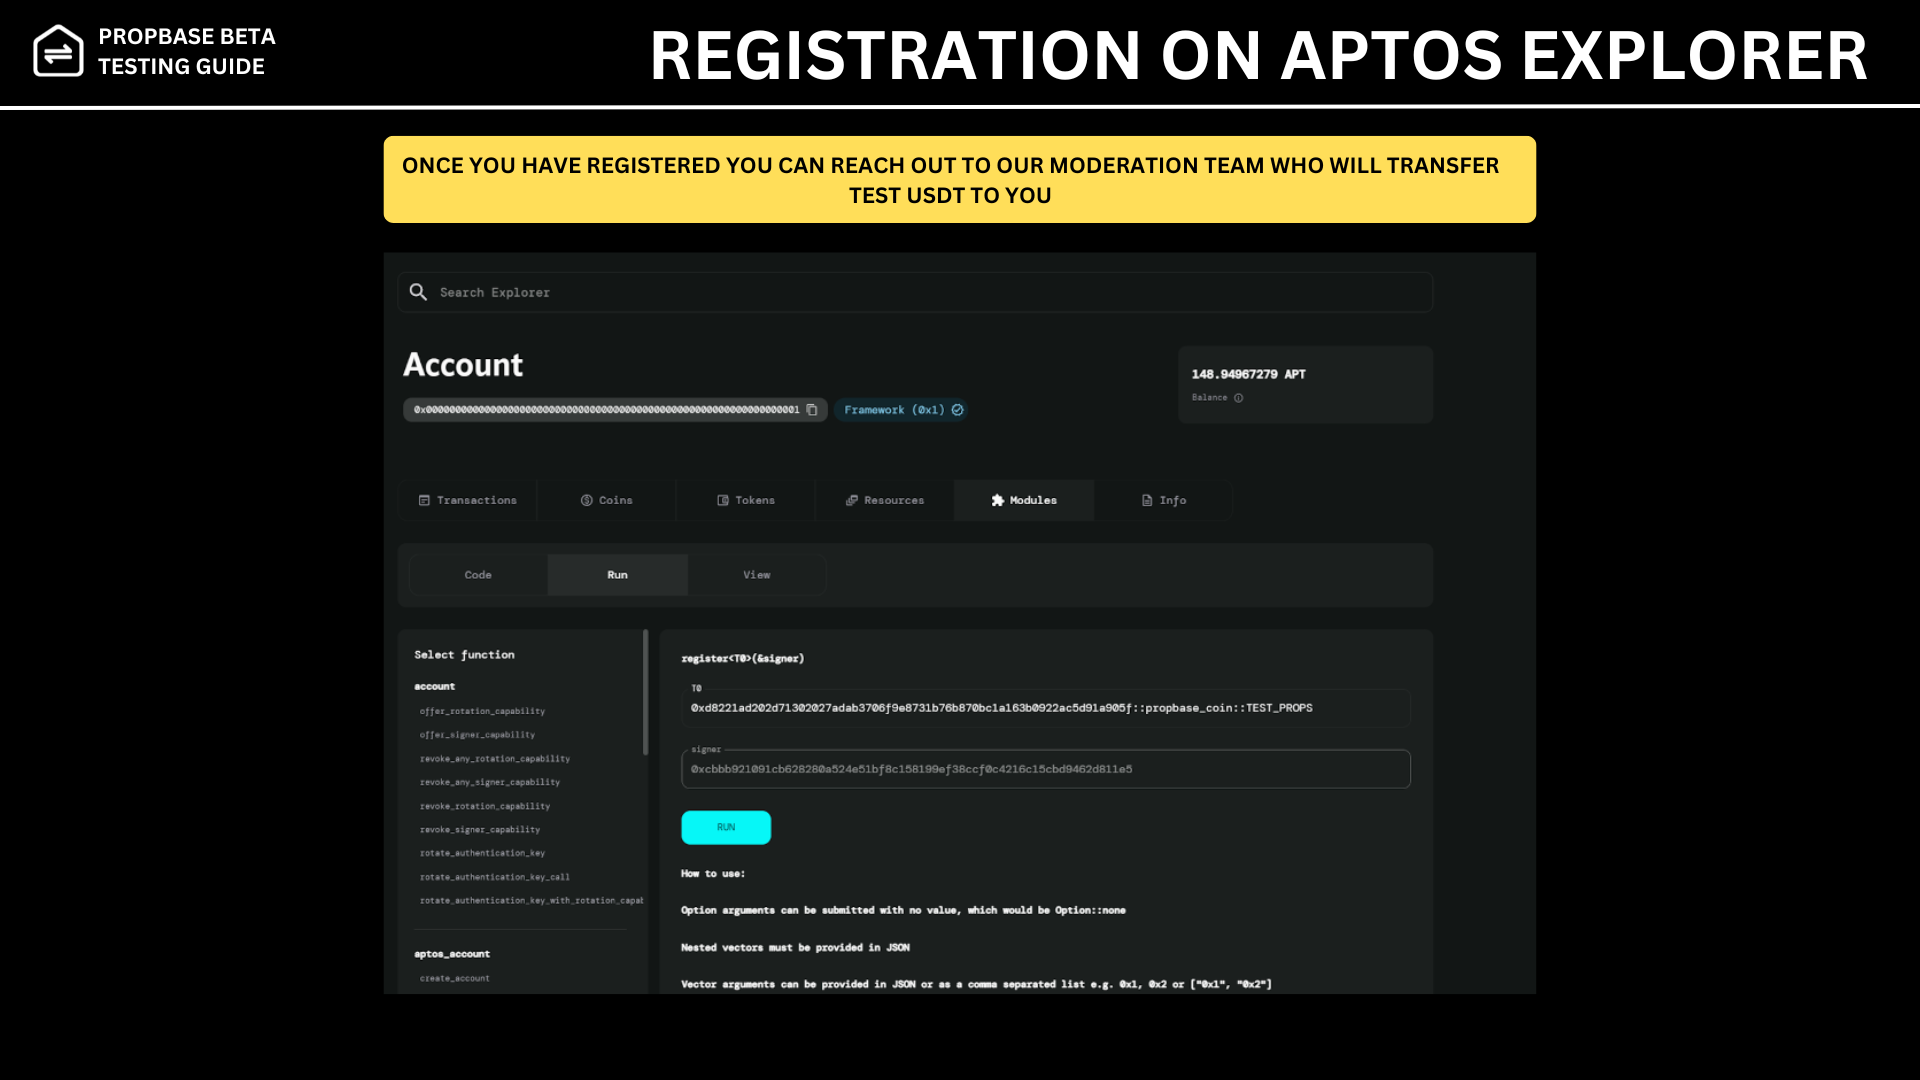
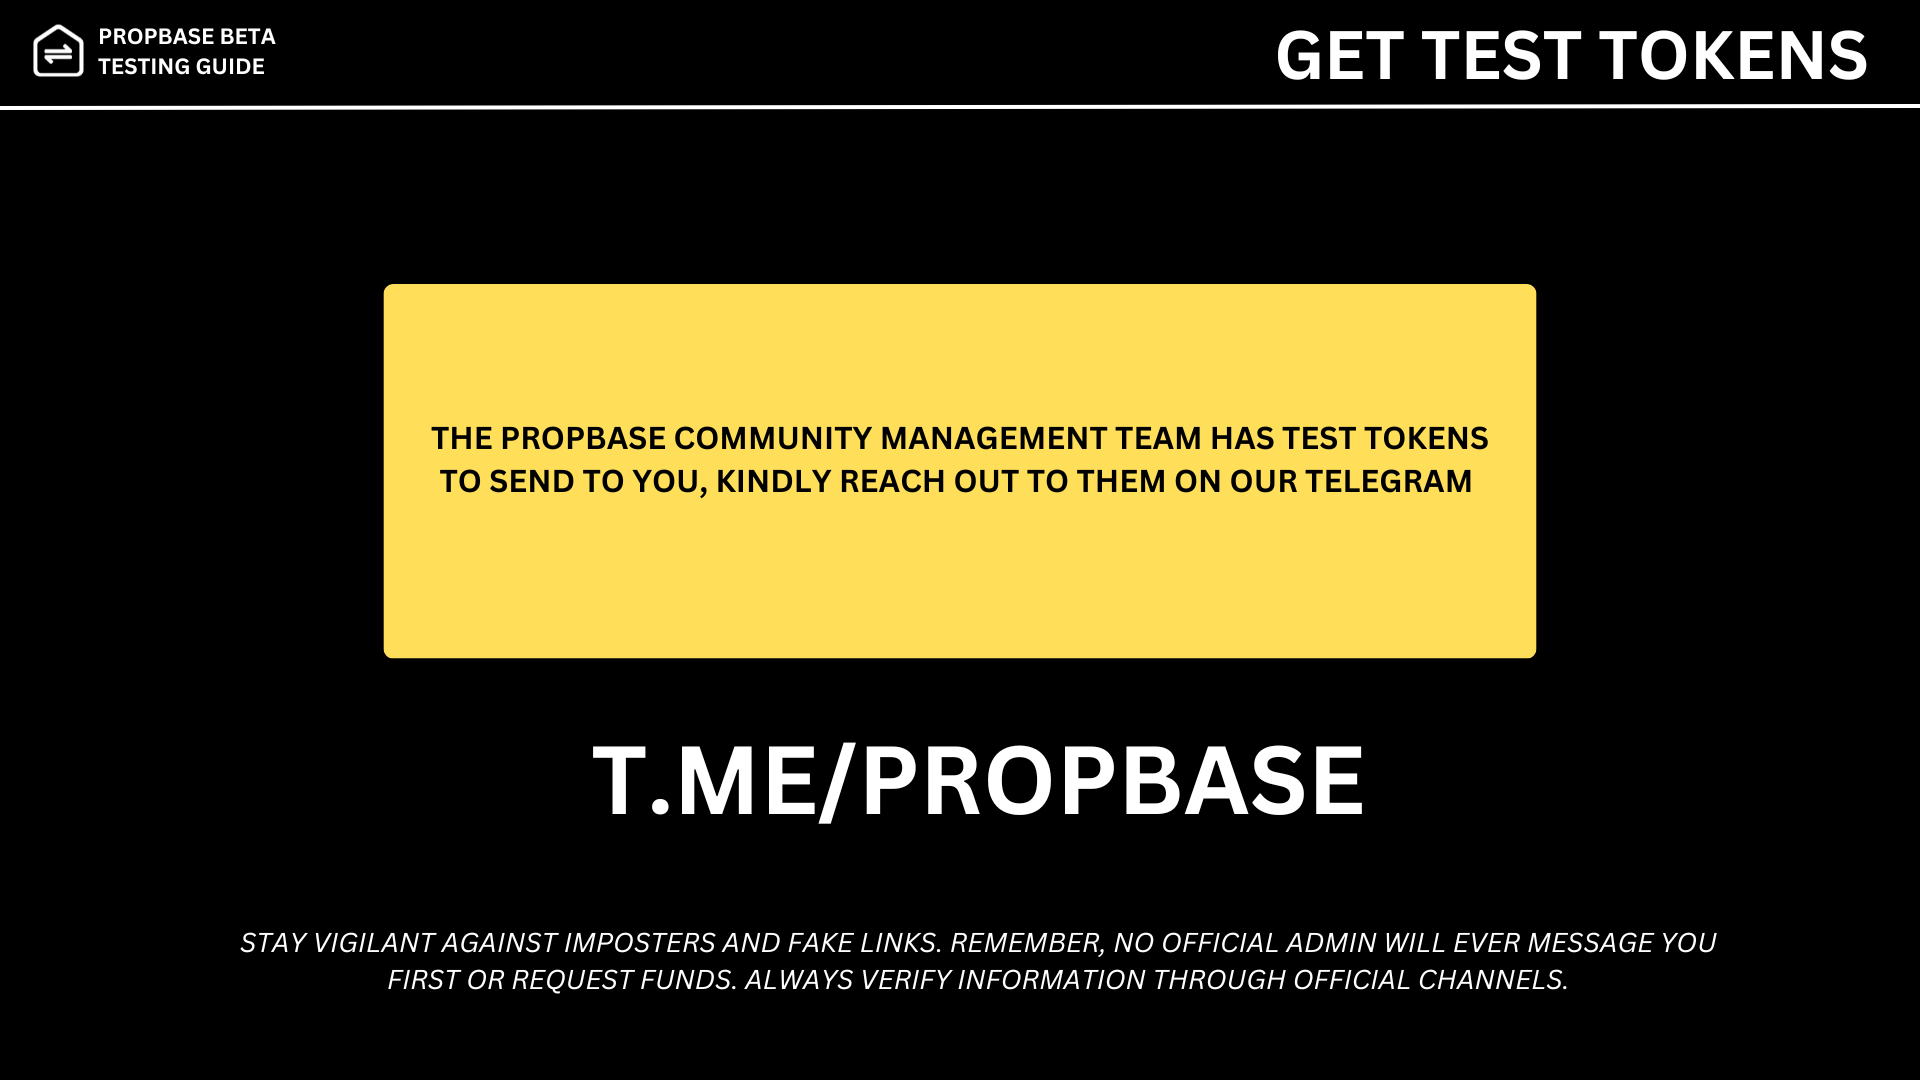
Contact our community management team to receive test tokens for BETA TESTNET purchases
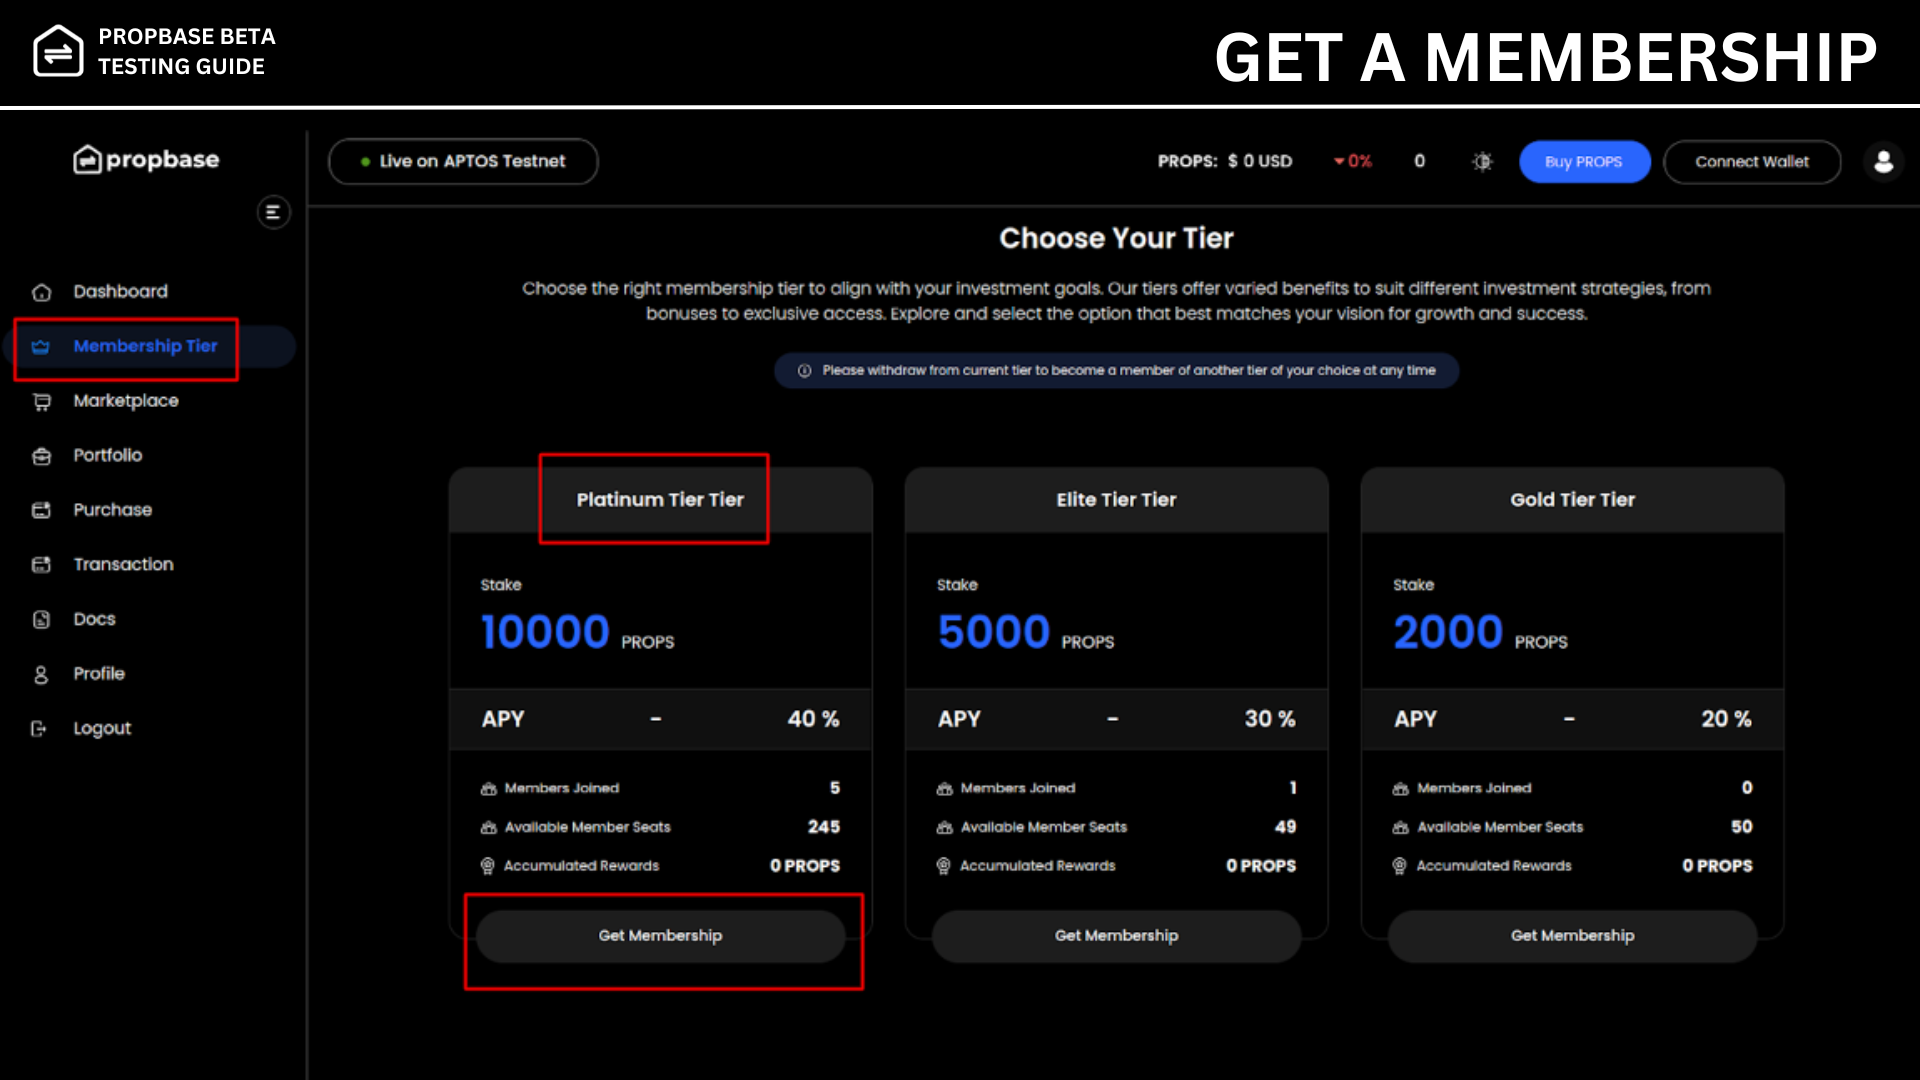
Step 7: Get Membership
Navigate to the Membership Tier Section and secure your membership.
Step 8: Register for the Property Sale Before Token Sale (Optional)
If the property sale hasn’t started yet, you can register for the sale from the Property detail page to stay engaged, though this step is not mandatory and you can still purchase the tokens even without registering
Buying & Claiming
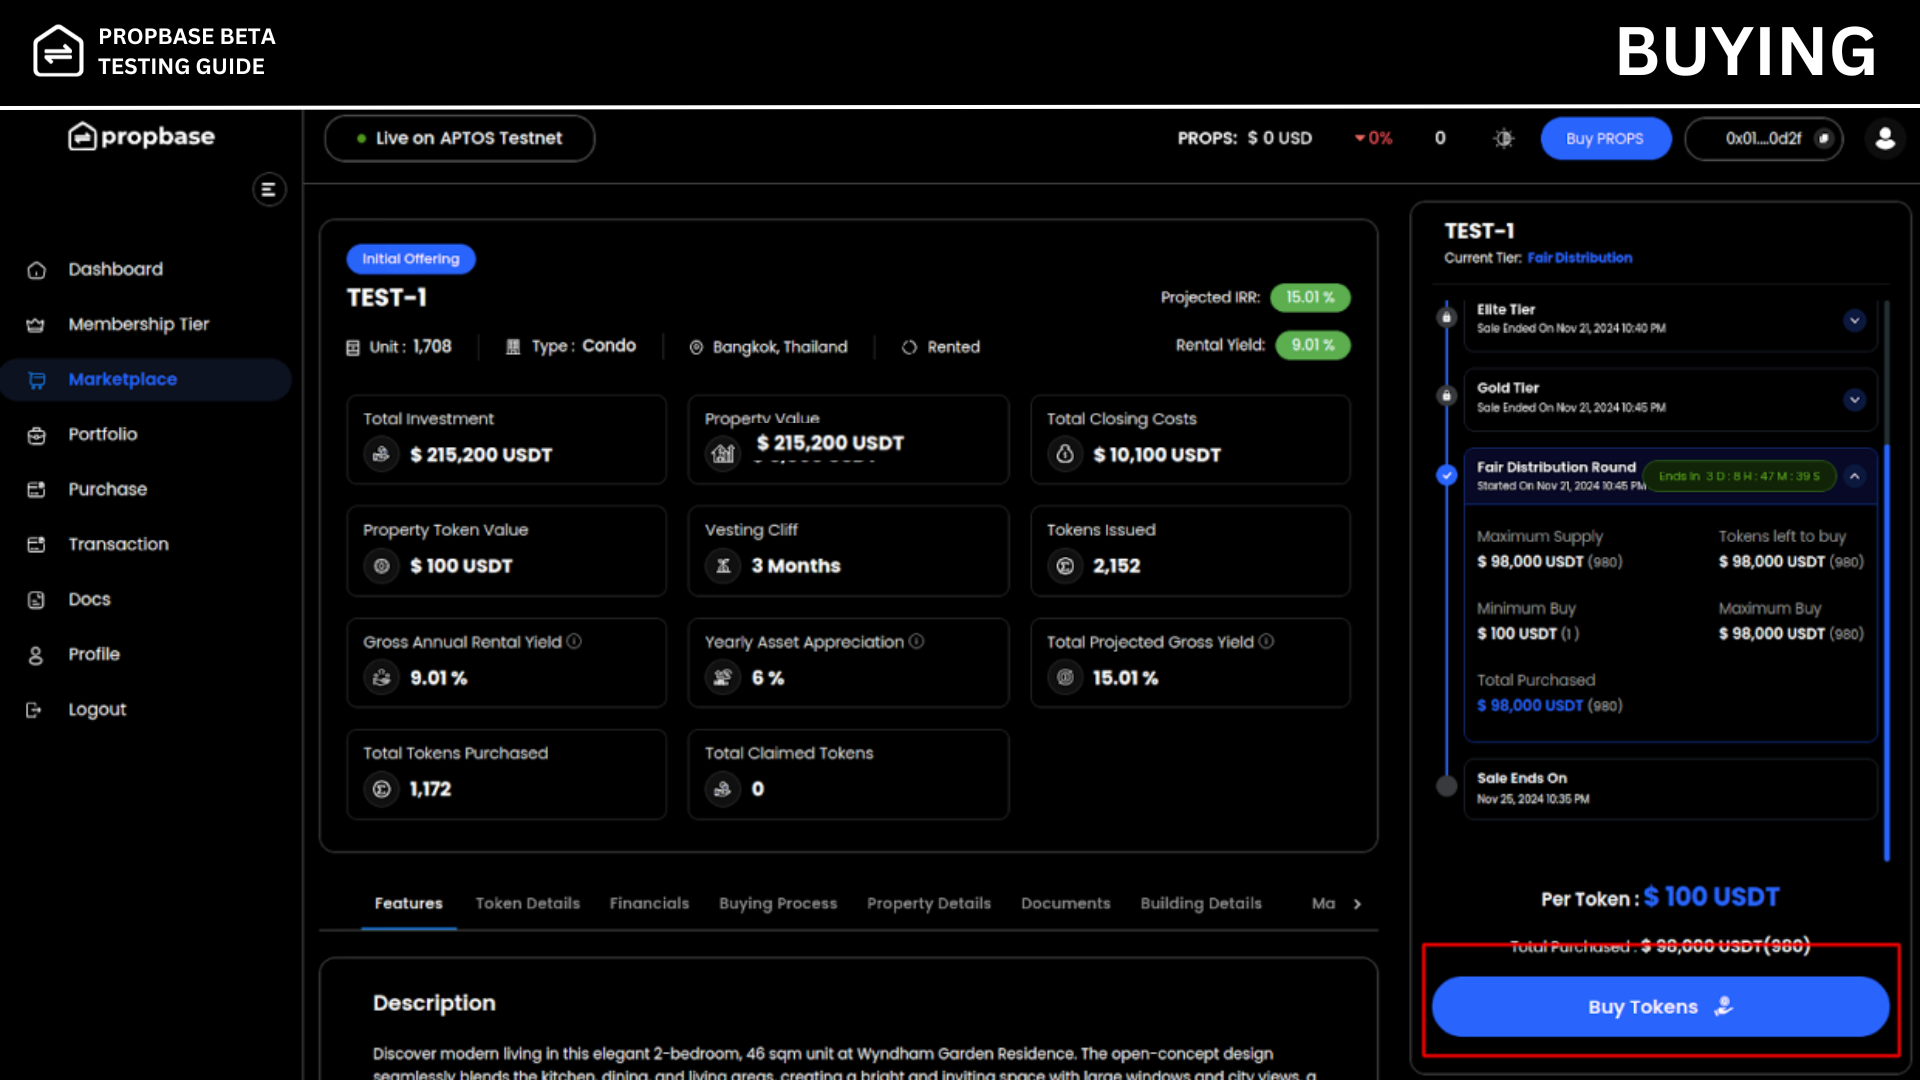
Step 9: Buy Tokens from the Marketplace
Browse the marketplace and select a property of your choice.
Click on the property to view the detail page of the property.
The Buy Tokens button is available in the detail page where you can purchase the amount of tokens of your choice.
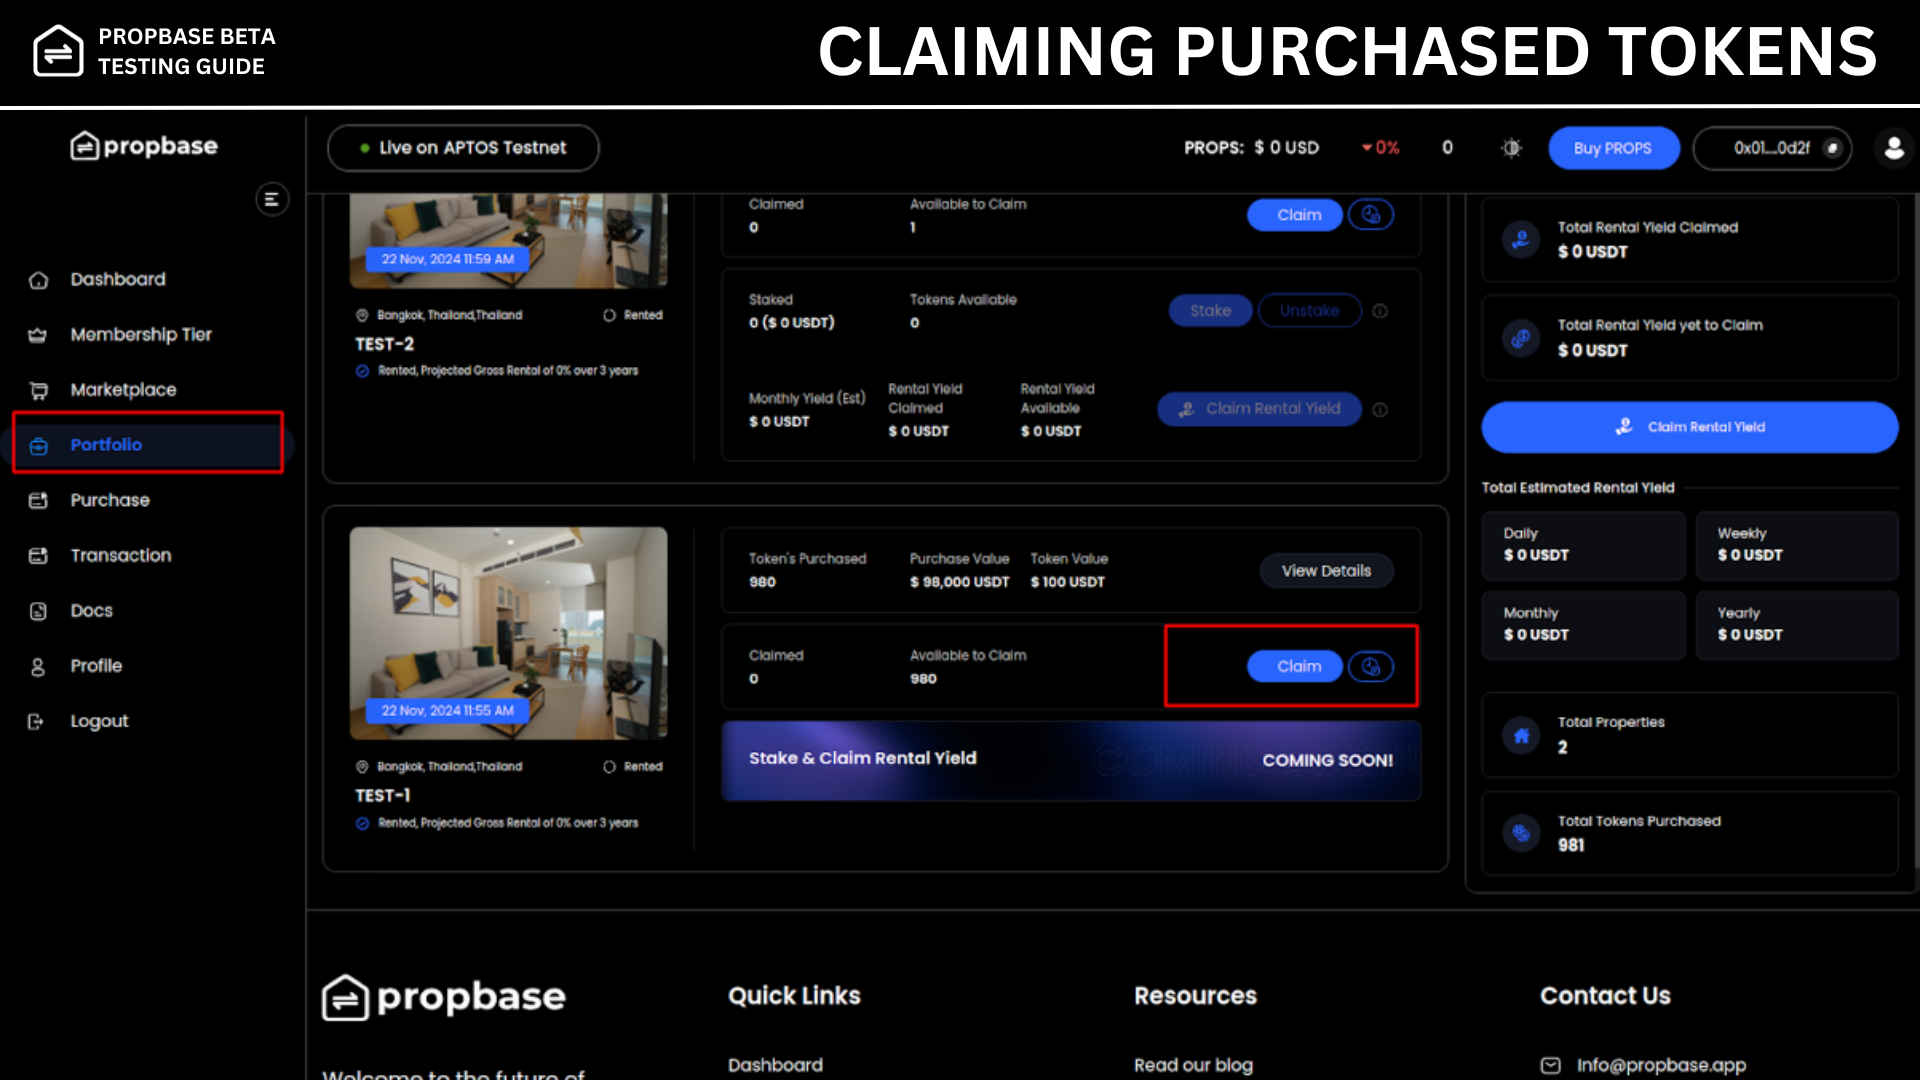
Step 10: Claim Your Tokens After the Sale Has Ended
Claim your purchased tokens from either:
The Portfolio Section
The Property Details Page
The claiming is done based on the token vesting schedule created by the admin.
Secondary Marketplace
Once you’ve completed the steps in the Primary Marketplace and successfully claimed tokens to your wallet, you can proceed to the Secondary Marketplace. Here, you can buy, sell, stake, unstake tokens, and claim rental yields. Follow the steps below:
Buy & Sell Tokens
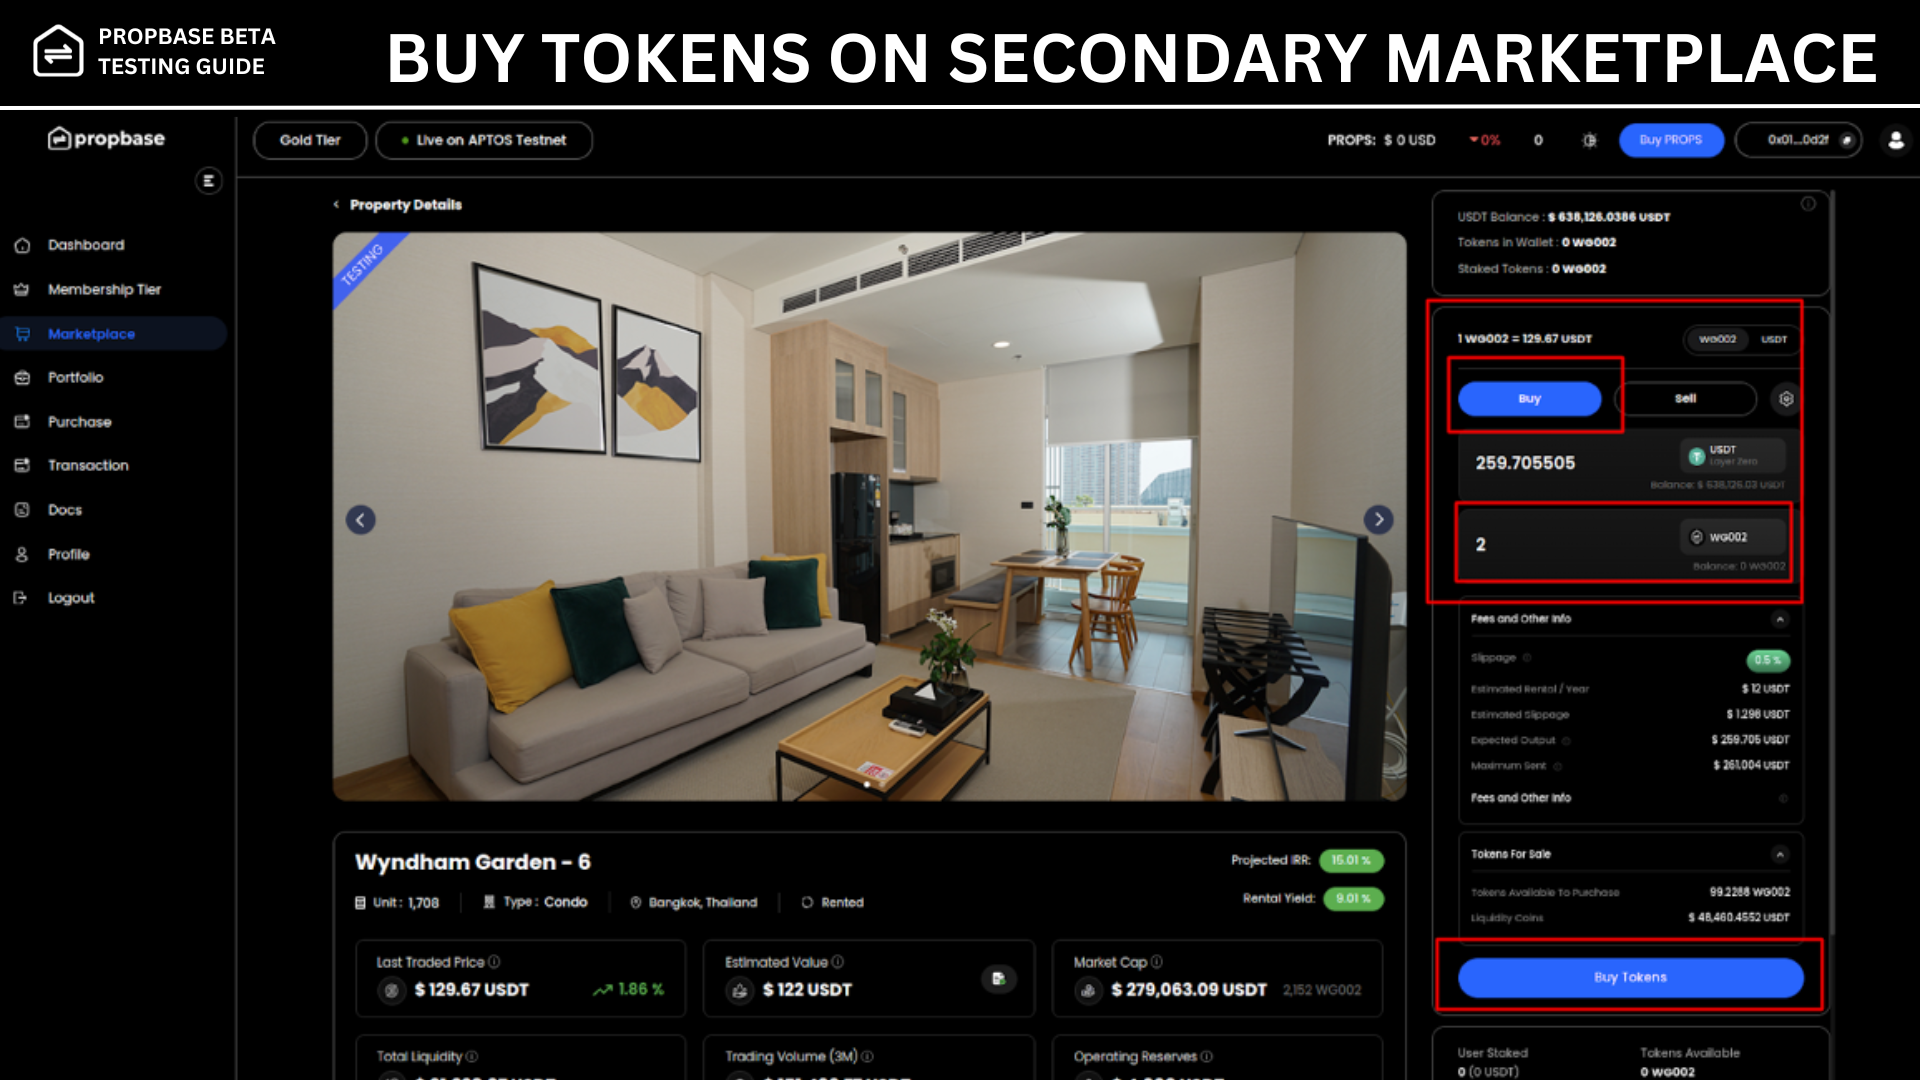
Step 11: Buy Tokens
Navigate to the Marketplace page.
Select a desired property from the available listings.
On the property details page, locate the side card section where the Buy and Sell options are displayed.
Select Buy, enter the number of tokens you want to purchase, and review the auto-calculated USDT equivalent.
After reviewing all purchase details, click on the Buy button to complete the transaction.
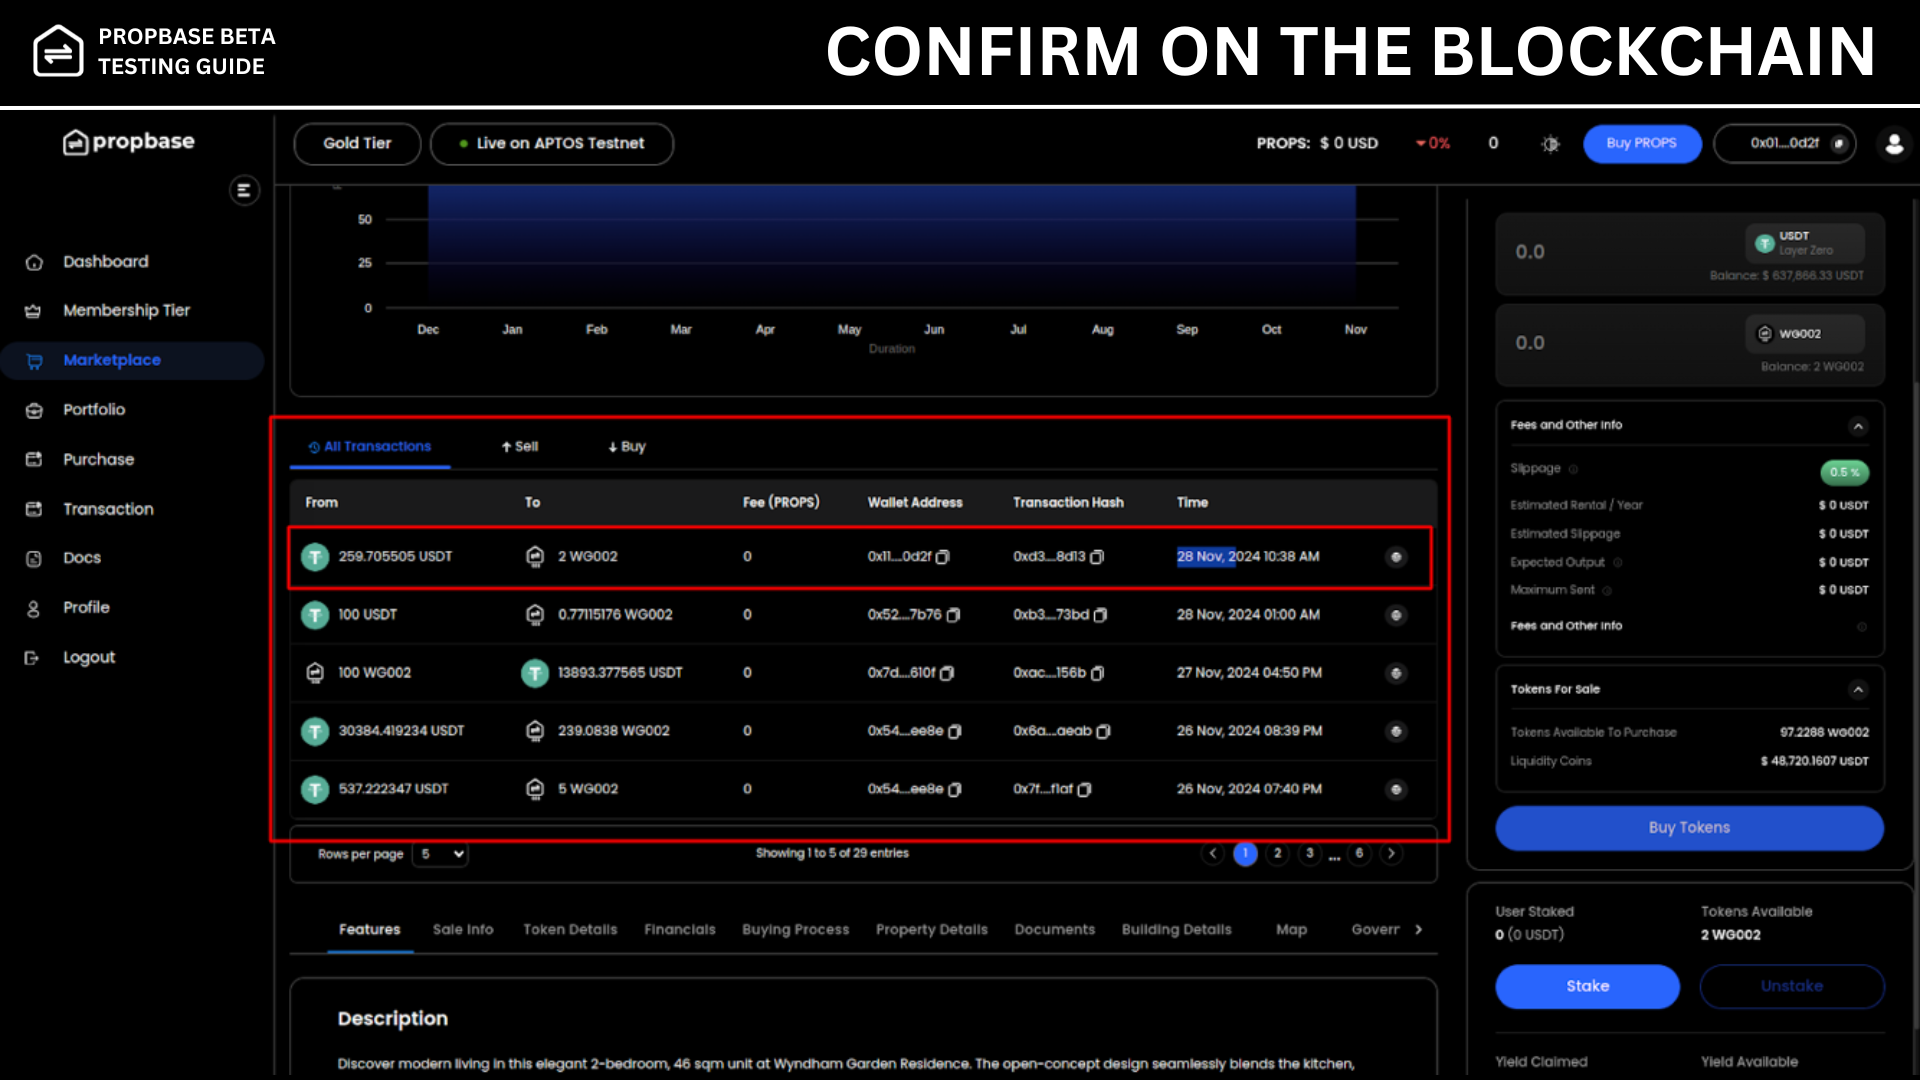
Step 12: Transaction Confirmation
Upon a successful purchase, a confirmation popup will appear.
Scroll down on the property details page to view all transactions, buy & sell related to that property.
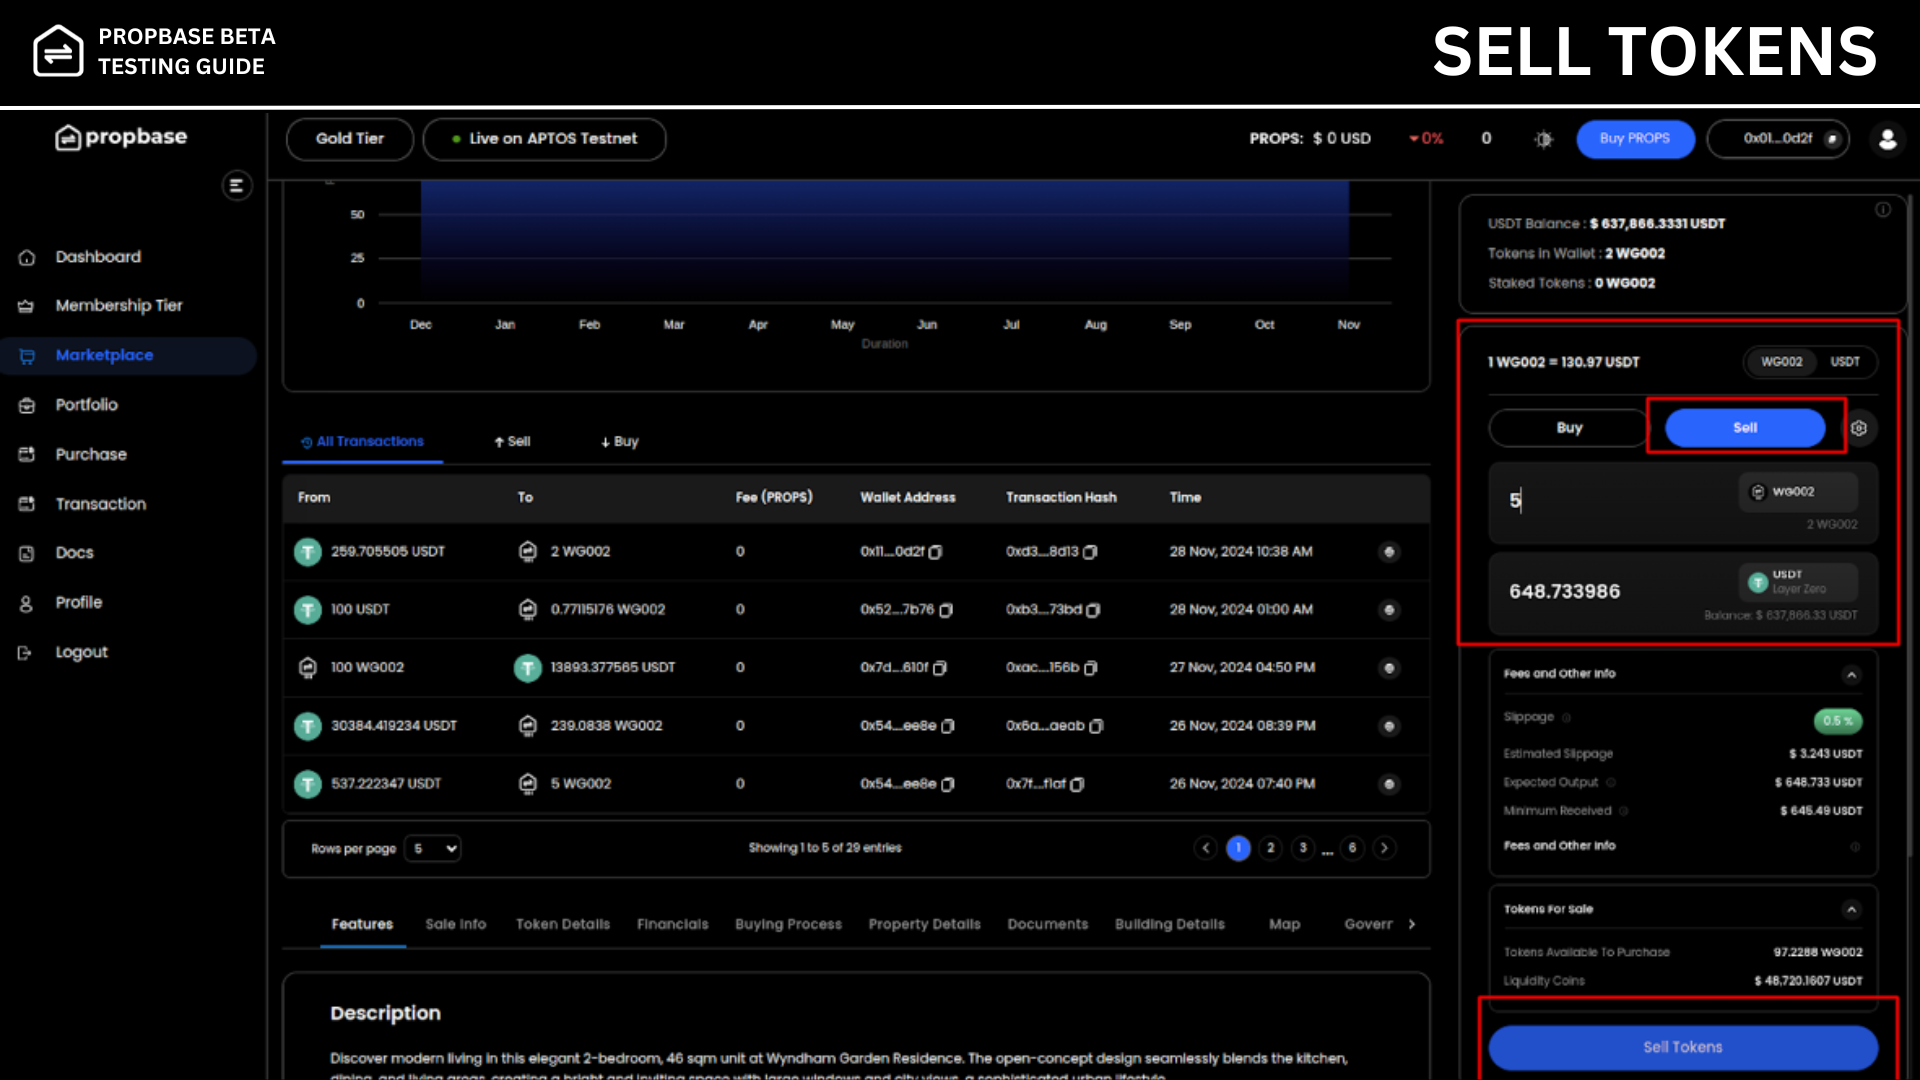
Step 13: Sell Tokens
To sell tokens, navigate to the Marketplace > Property Details page.
Select Sell, input the number of tokens you wish to sell, and confirm by clicking the Sell button.
Stake & Claim Rental Yield
Step 14: Wallet Operations
With tokens in your wallet, you can perform two additional actions:
Stake Tokens:
Navigate to your Portfolio or the Marketplace Property Details page.
Click on the Stake button to stake your tokens.
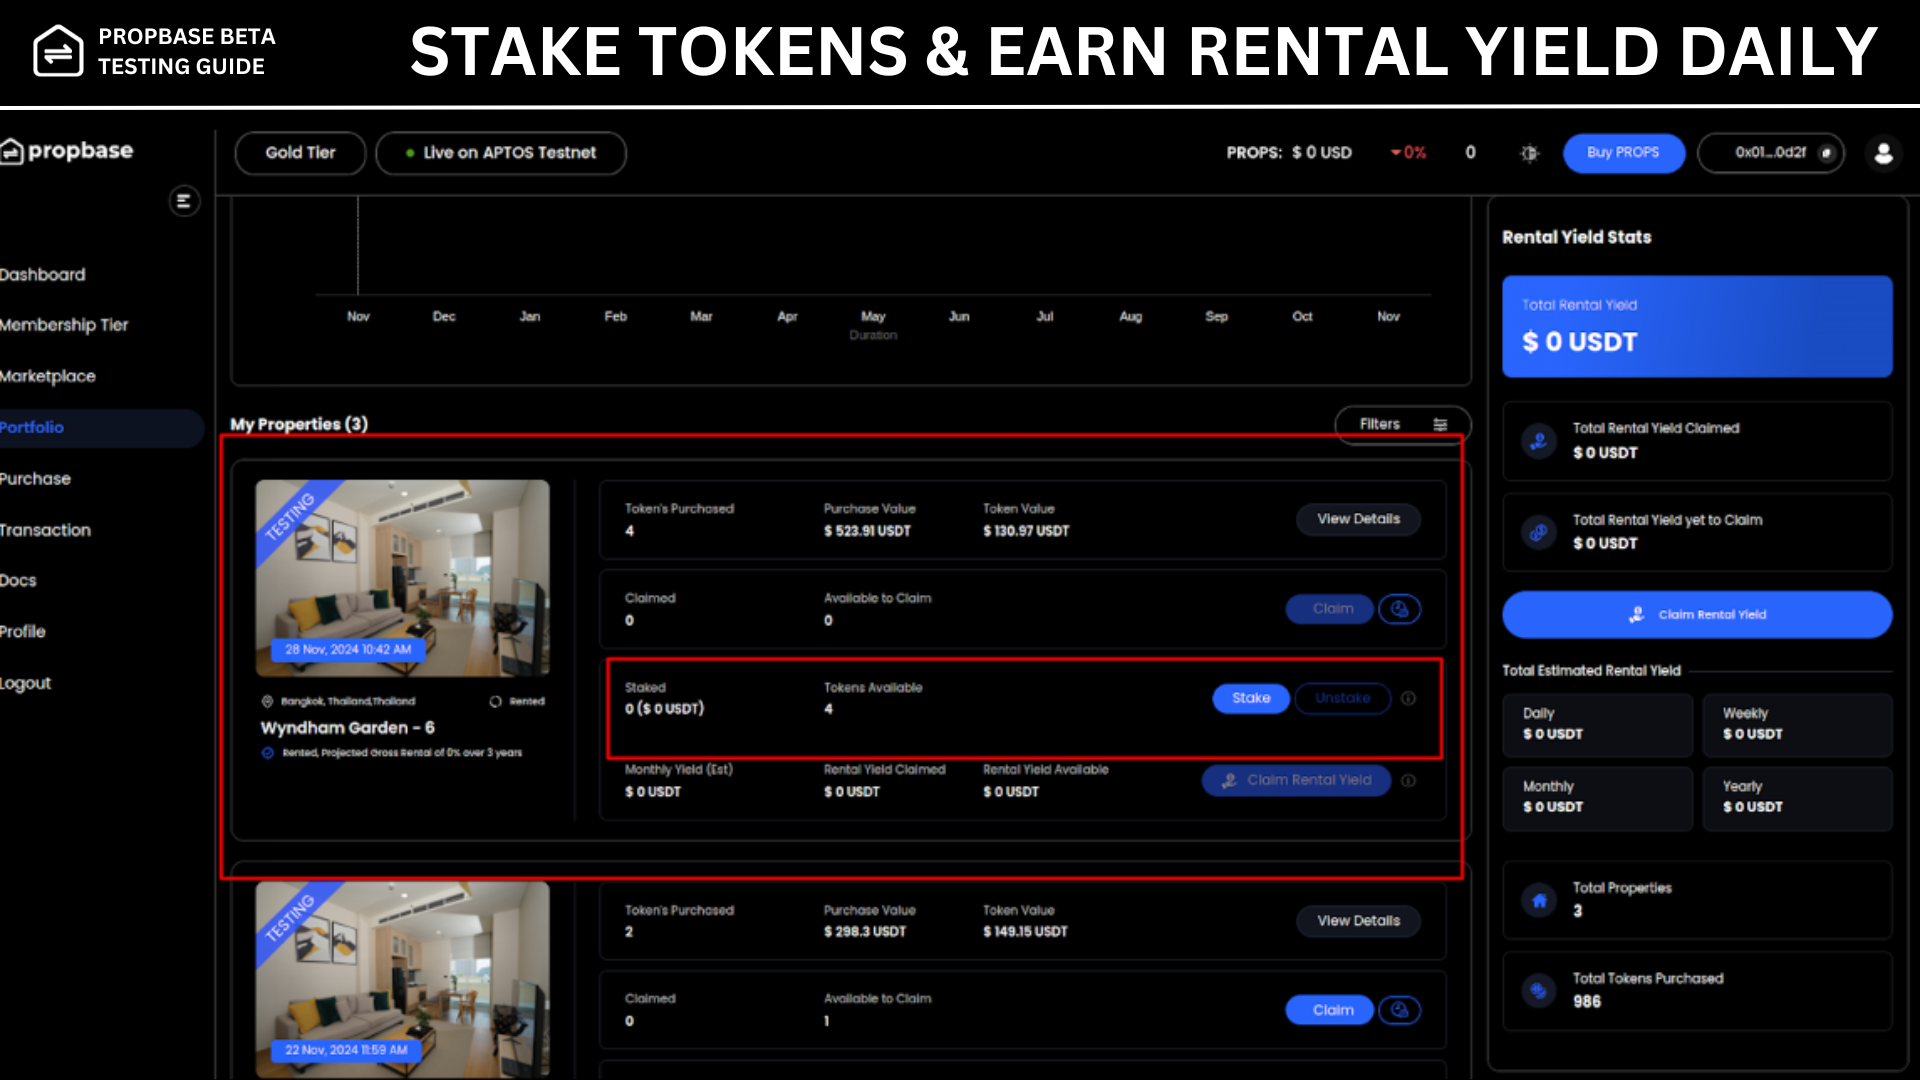
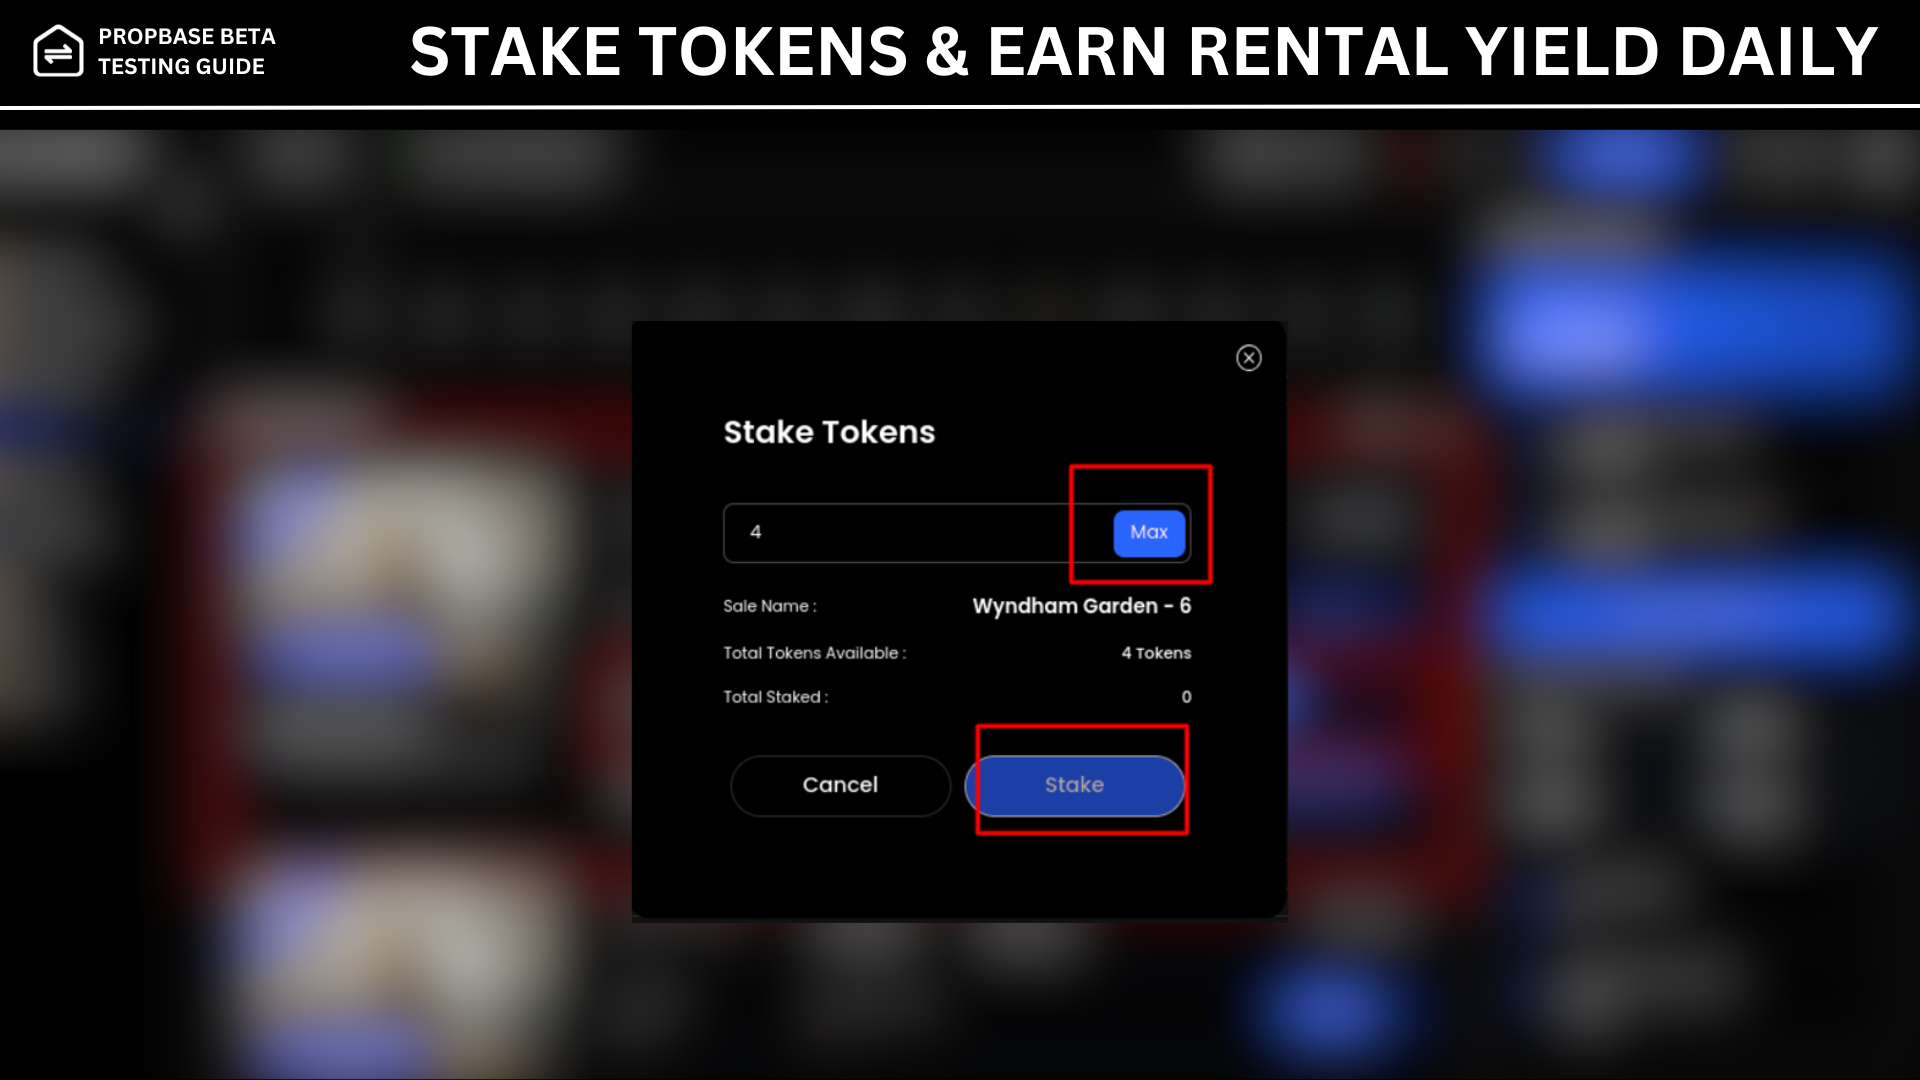
Enter the desired amount of tokens to stake and then click the Stake button to start earning yield.
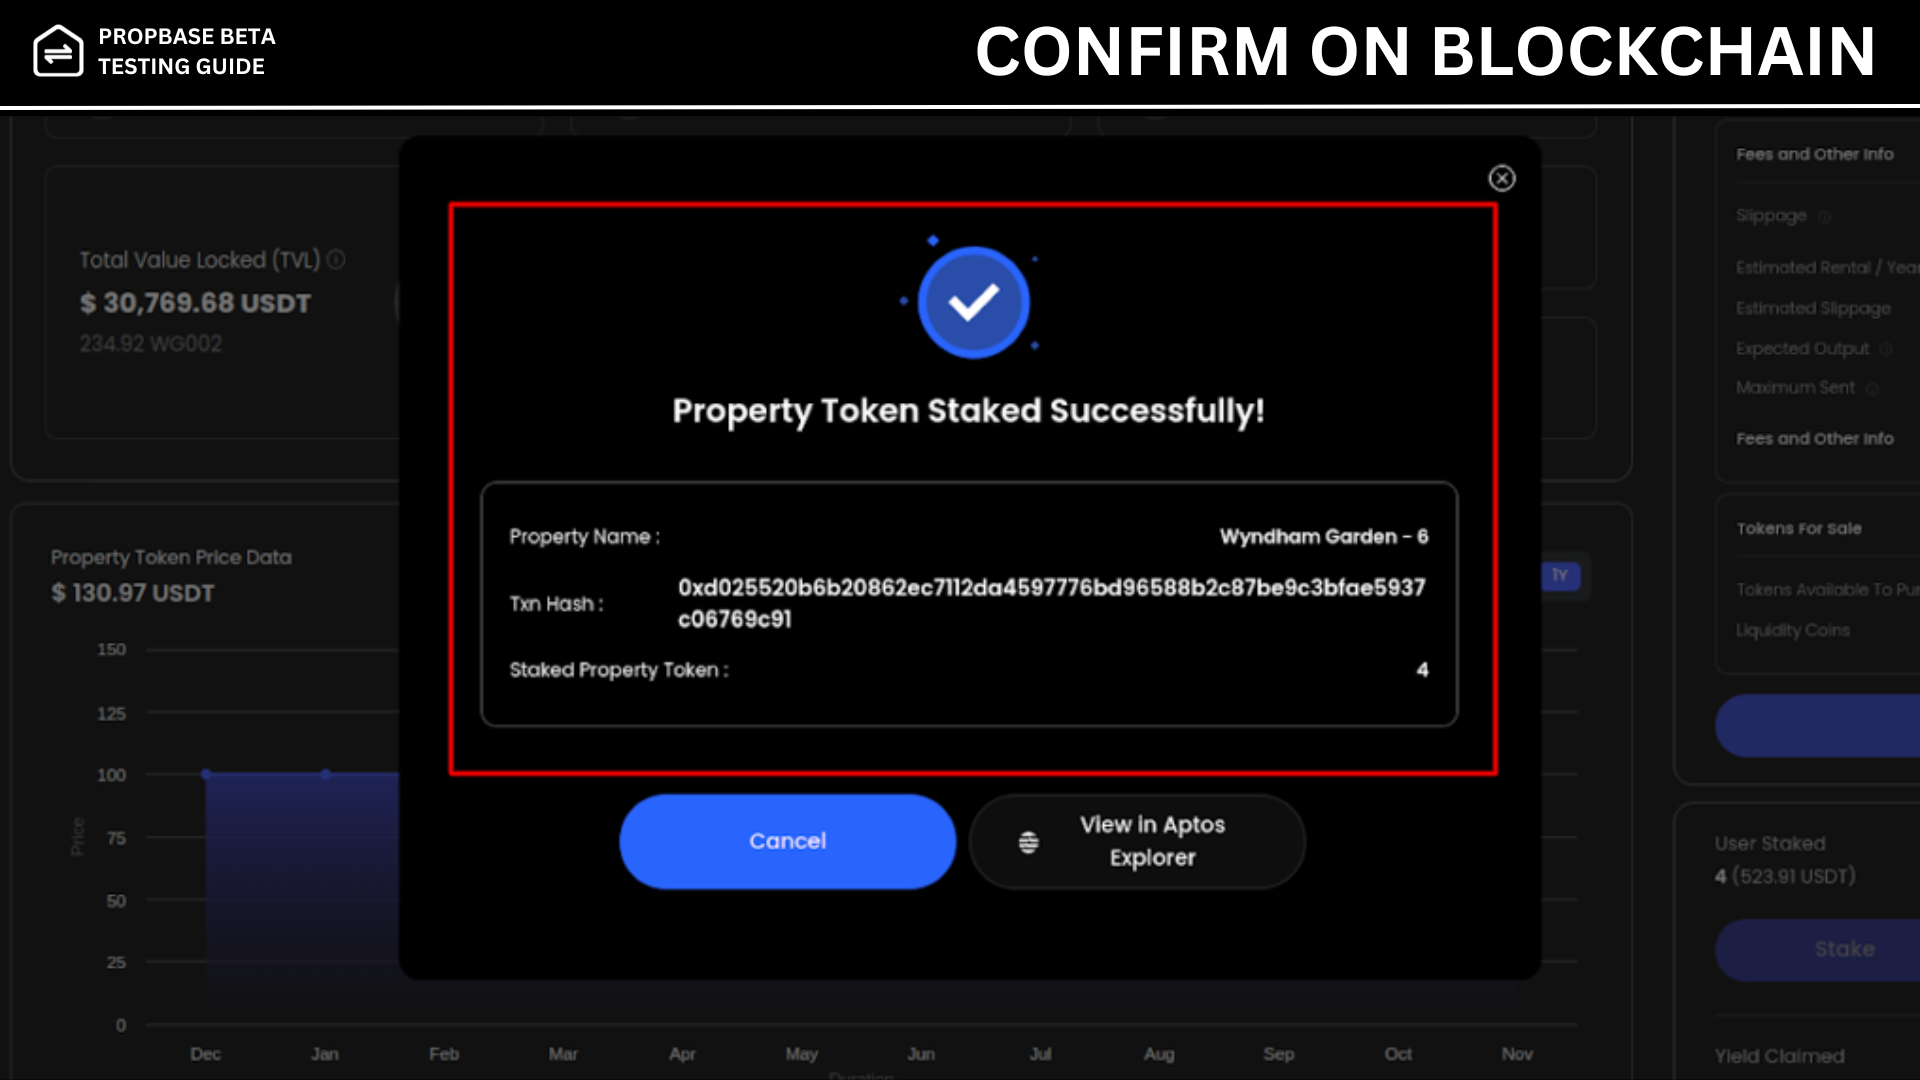
A success popup with the stake details will be displayed after successful staking.
Users can also unstake their tokens at any time. Once tokens are staked, the 'Unstake' button becomes active, allowing users to select and unstake their desired amount. Note that the rental yield will adjust accordingly based on the reduced staked amount.
Claim Rental Yield:
Visit either the Portfolio or the Marketplace Property Details page in order to claim the rental yield.
Click on the Claim Rental Yield button. A popup will be displayed with the claim details such as claimed and amount available to claim etc.
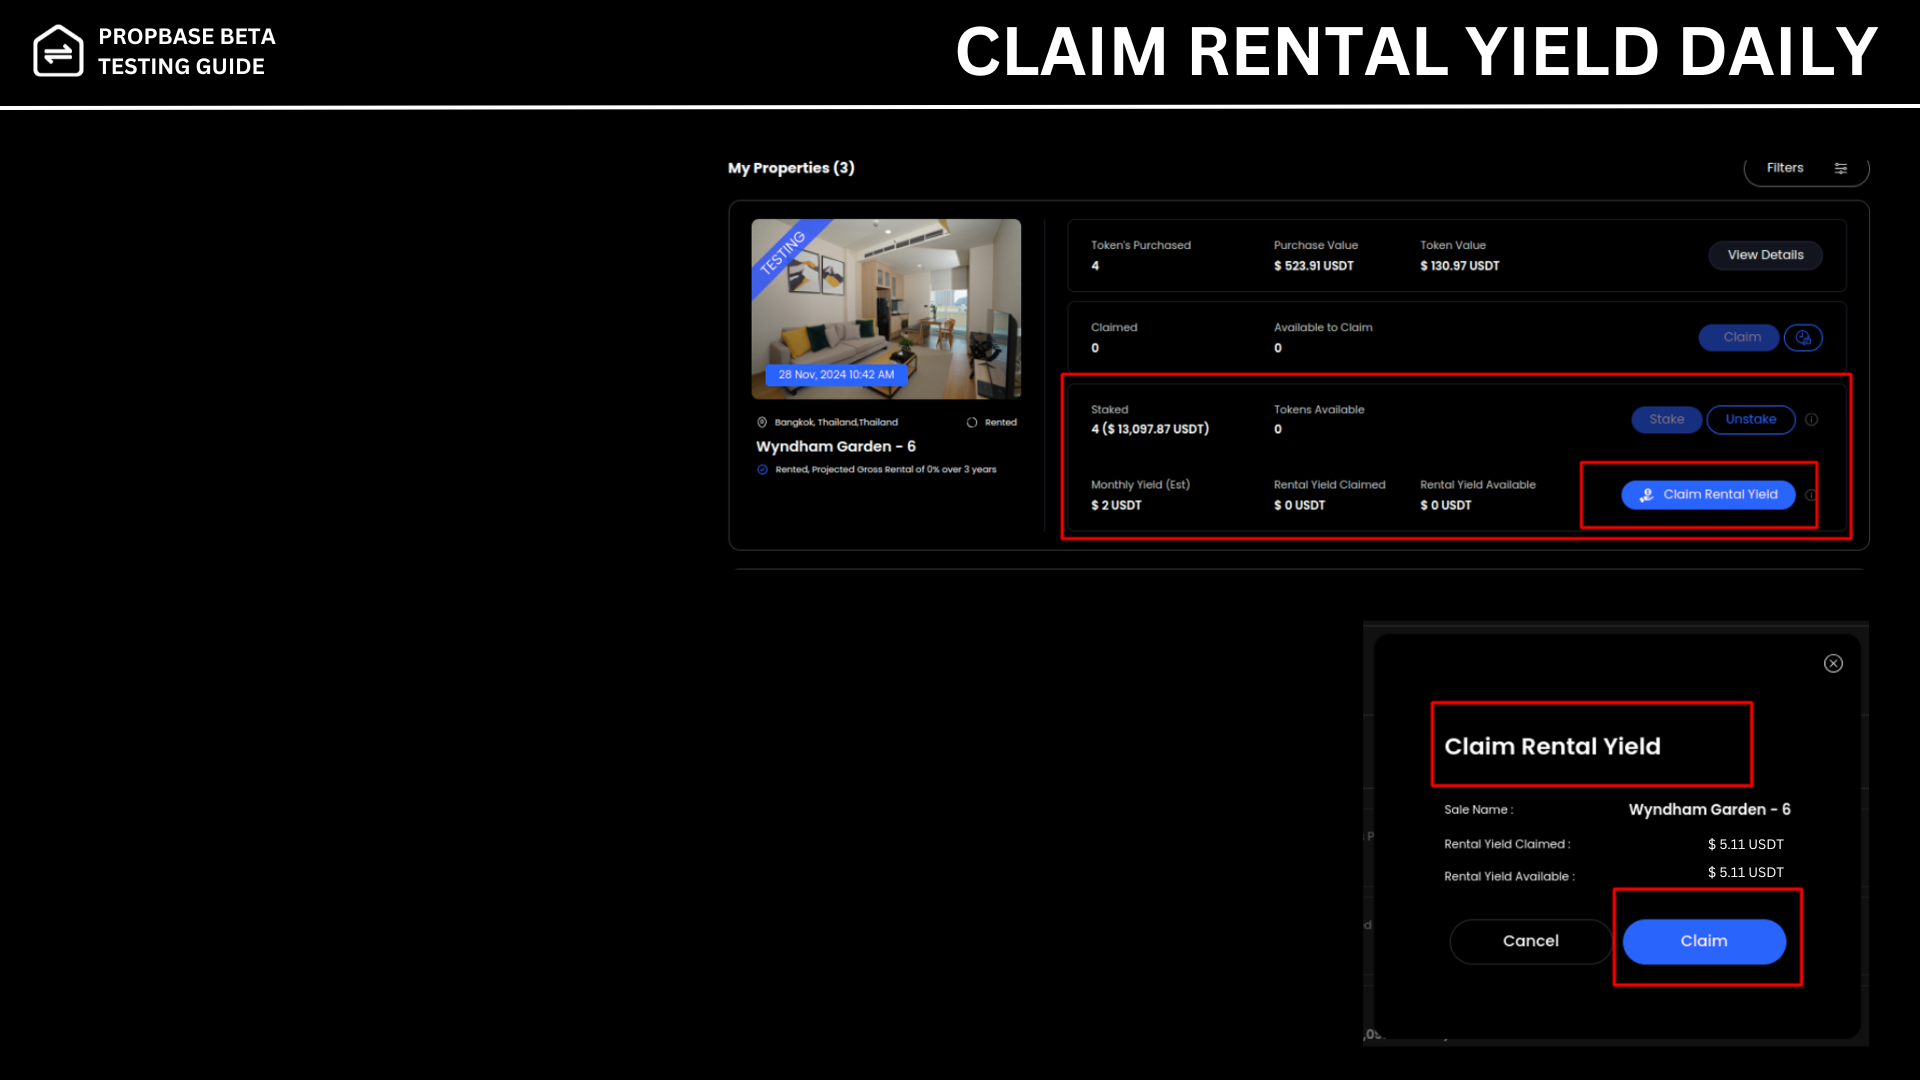
Ensure you claim within the specified period. If the yield is unavailable for claim, the next eligible date and time will be displayed.

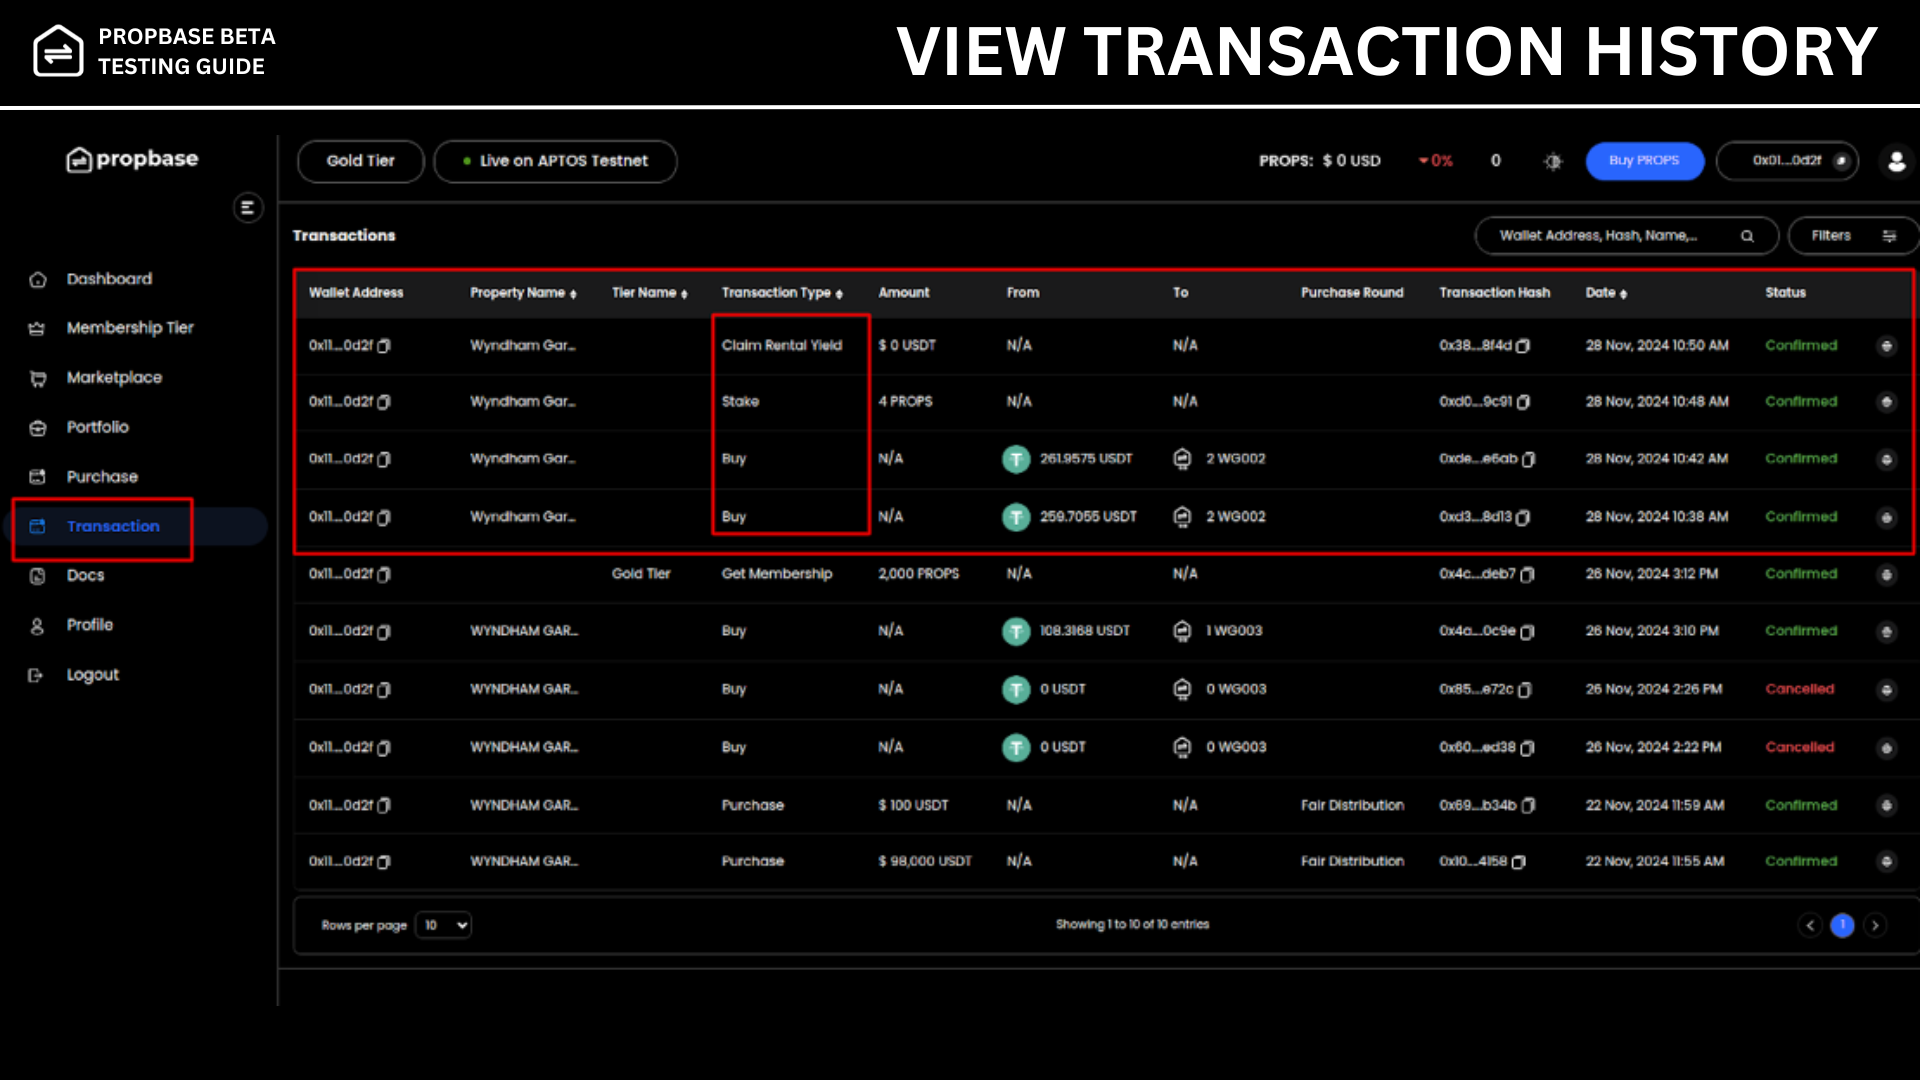
Step 15: View Transaction History
To track all your activities, go to the Transactions menu from the side panel.
Here, you’ll find a comprehensive table listing all your transactions for better understanding and reference.
Thank you for supporting us and joining our BETA Testing ahead of MAINNET Launch! Coming Soon!
We truly appreciate your participation in this journey. Your feedback is invaluable in refining Propbase. If you encounter any issues or have suggestions, don’t hesitate to reach out. Let’s work together to create an exceptional platform!
Kevin & Team